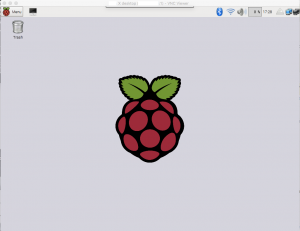
Raspberry Piには普段SSHで入ってますが、GUIを使うときはいちいちテレビつけないとで面倒なので、
下記ブログを参考にVNC Serverを入れてみました。
http://d.hatena.ne.jp/pasela/20121225/raspi_vnc
1 VNC Serverのインストール
VNC Severにもいろんな種類がありますが、例にならって「tightvncserver」をインストールします。
pi@raspberrypi:~ $ sudo apt-get install tightvncserver
Reading package lists… Done
Building dependency tree
Reading state information… Done
The following packages were automatically installed and are no longer required:
x11-apps x11-session-utils xbase-clients xbitmaps
Use ‘apt-get autoremove’ to remove them.
Suggested packages:
tightvnc-java
The following NEW packages will be installed:
tightvncserver
0 upgraded, 1 newly installed, 0 to remove and 0 not upgraded.
Need to get 555 kB of archives.
After this operation, 1,416 kB of additional disk space will be used.
Get:1 http://mirrordirector.raspbian.org/raspbian/ jessie/main tightvncserver armhf 1.3.9-6.5 [555 kB]
Fetched 555 kB in 1s (302 kB/s)
Selecting previously unselected package tightvncserver.
(Reading database … 120529 files and directories currently installed.)
Preparing to unpack …/tightvncserver_1.3.9-6.5_armhf.deb …
Unpacking tightvncserver (1.3.9-6.5) …
Processing triggers for man-db (2.7.0.2-5) …
Setting up tightvncserver (1.3.9-6.5) …
update-alternatives: using /usr/bin/tightvncserver to provide /usr/bin/vncserver (vncserver) in auto mode
update-alternatives: using /usr/bin/Xtightvnc to provide /usr/bin/Xvnc (Xvnc) in auto mode
update-alternatives: using /usr/bin/tightvncpasswd to provide /usr/bin/vncpasswd (vncpasswd) in auto mode
pi@raspberrypi:~ $
2 VNC Server起動
ディスプレイ番号(ここでは「1」)をつけて起動します。
VNCで接続する際に使用するパスワードを聞いてくるので入力します(通常のユーザパスワードとは別指定です)。
pi@raspberrypi:~ $ vncserver :1
You will require a password to access your desktops.
Password:
Verify:
Would you like to enter a view-only password (y/n)? n
2
New ‘X’ desktop is raspberrypi:1
Creating default startup script /home/pi/.vnc/xstartup
Starting applications specified in /home/pi/.vnc/xstartup
Log file is /home/pi/.vnc/raspberrypi:1.log
ちなみの、停止させる場合は「vncserver -kill :1」です。
3 VNC接続
クライアントからVNC接続します。
今回はRealVNCを使用しました。
https://www.realvnc.com/download/vnc/

