「Linux」カテゴリーアーカイブ

do-release-upgradeしただけなのにWordPressが壊れた

do-release-upgradeコマンドでUbuntu 20.04.4 LTSからUbuntu 22.04.1 LTSに上げたところ、Wordpressが壊れてしまったので復旧メモです。

【症状】

・とりあえずOSは起動する

・SSHもつながる

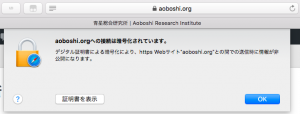
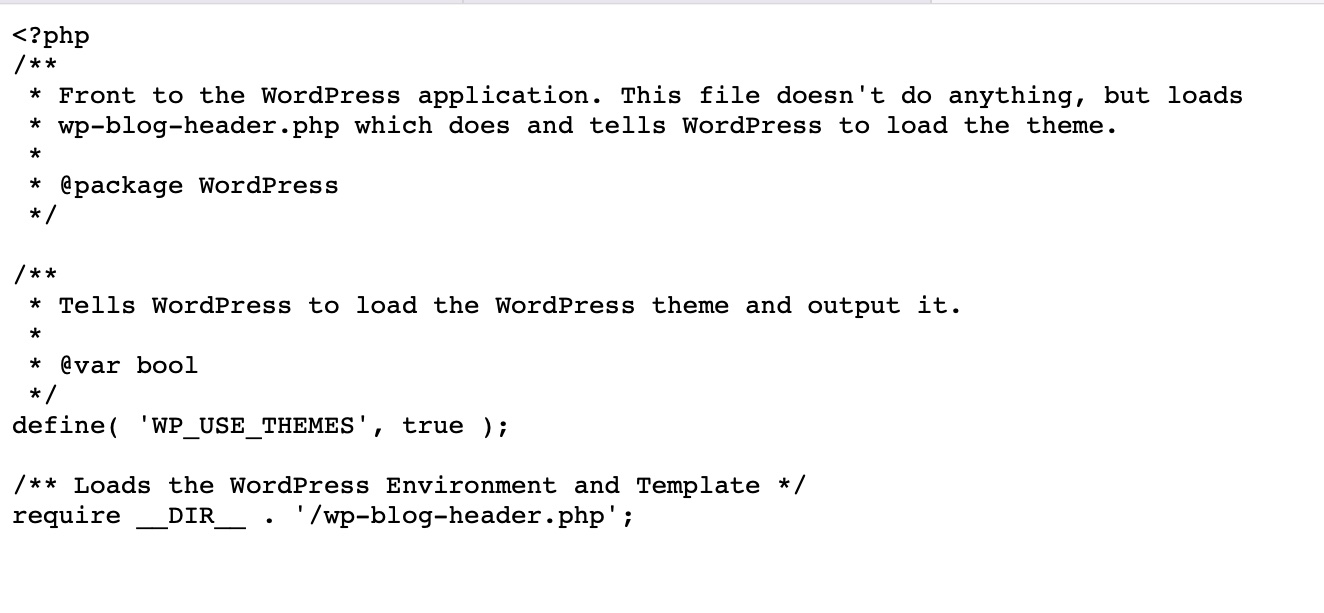
・下記のような画面になりWordpressが開かない

【対処法】

1.libapache2-mod-phpのインストール

phpinfo.phpおいても表示されないなど、ApacheがPHP読み込めてないようだったので、libapache2-mod-phpをインストールします。

# apt-get install libapache2-mod-php

2.a2enmodコマンド実行

Apacheに読み込ませるPHPを指定します。

# a2enmod php8.1

この状態でとりあえずphpinfo.phpは見られるようになりましたが、Wordpressは500エラーになってしまいます。

3.Wordpress再インストール

/var/www/html/配下のWordpress関係のファイルを全て消して、再インストールしなおします。

再設定した状態で再度Wordpressにアクセスすると、画像表示がされないなど壊れた状態ですが管理画面にログインできるようになりました。

4.バックアップからの復元

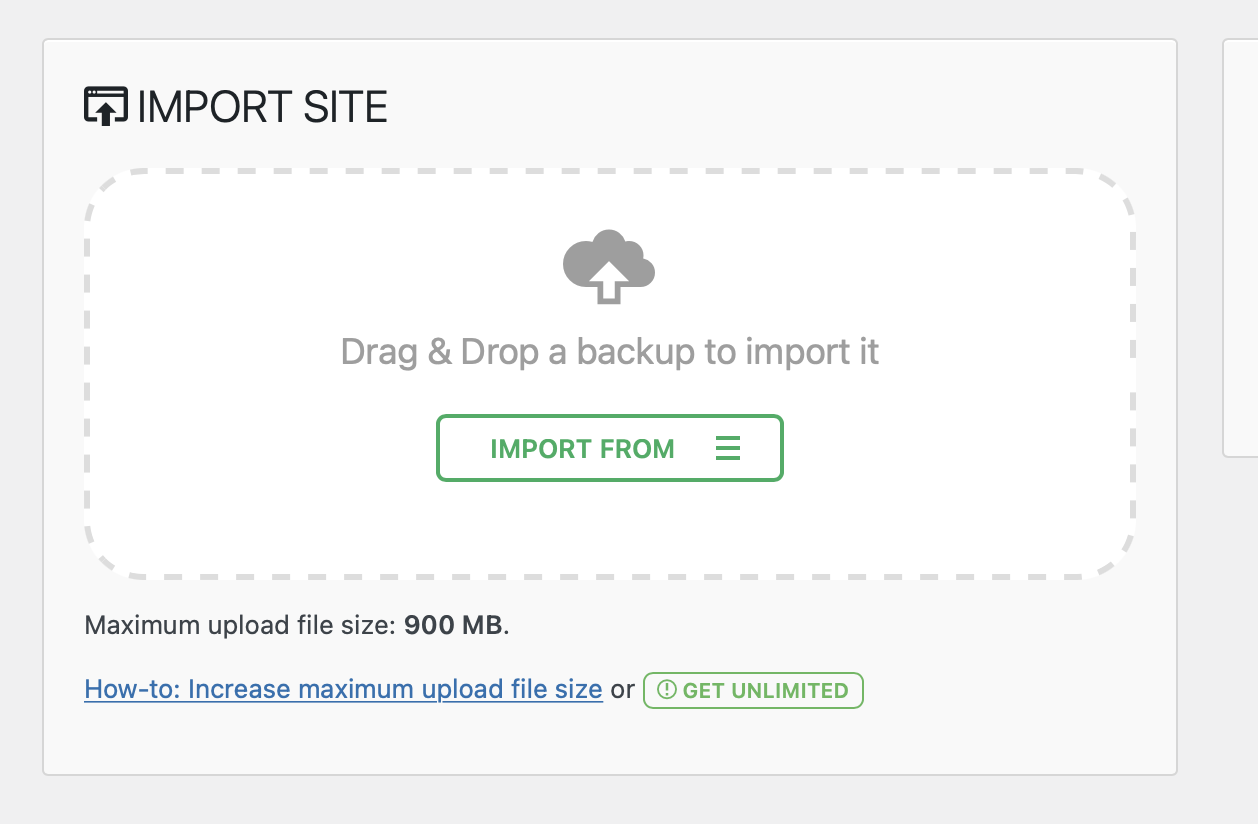
以前のように「All-in-One WP Migration」を使用してバックアップから復元しようとしましたが、バックアップファイルが500MBを超えているので前回のような小手先が使えません。

そこで、

/etc/php/8.1/apache2/php.ini

の設定変更を行うことで対応しました。(太字が変更箇所)

upload_max_filesize = 900M

post_max_size = 900M

memory_limit = 900M

アップロード上限が2MB→900MBに増加

とりあえず復旧でき、OSのアップデートもできましたが、今後はメジャーアップデートの際は新規構築が望ましいかもしれません、

Let’s EncryptのTLS-SNI-01終了対応

本日Let’s Encryptからメールが来ました。

Action required: Let’s Encrypt certificate renewals

Hello,

Action may be required to prevent your Let’s Encrypt certificate renewals
from breaking.

If you already received a similar e-mail, this one contains updated
information.

Your Let’s Encrypt client used ACME TLS-SNI-01 domain validation to issue
a certificate in the past 60 days. Below is a list of names and IP
addresses validated (max of one per account):

aoboshi.org (35.230.123.50) on 2019-01-18

TLS-SNI-01 validation is reaching end-of-life. It will stop working
temporarily on February 13th, 2019, and permanently on March 13th, 2019.
Any certificates issued before then will continue to work for 90 days
after their issuance date.

You need to update your ACME client to use an alternative validation
method (HTTP-01, DNS-01 or TLS-ALPN-01) before this date or your
certificate renewals will break and existing certificates will start to
expire.

Our staging environment already has TLS-SNI-01 disabled, so if you’d like
to test whether your system will work after February 13, you can run
against staging: https://letsencrypt.org/docs/staging-environment/

If you’re a Certbot user, you can find more information here:
https://community.letsencrypt.org/t/how-to-stop-using-tls-sni-01-with-certbot/83210

Our forum has many threads on this topic. Please search to see if your
question has been answered, then open a new thread if it has not:
https://community.letsencrypt.org/

For more information about the TLS-SNI-01 end-of-life please see our API
announcement:
https://community.letsencrypt.org/t/february-13-2019-end-of-life-for-all-tls-sni-01-validation-support/74209

Thank you,
Let’s Encrypt Staff

なんだと思って調べたら、ドメイン検証方式「TLS-SNI-01」に脆弱性が見つかり、2月13日をもってその方式を使用できなくするので、60日以内にその方式でSSL証明書のアップデートをしていたユーザに対して別方式を使用するよう警告が着たようでした。

Let’s Encryptの管理プログラム「certbot」を0.28以上にアップデートすればいいらしいので、確認をしたところ、

root@wordpress-vm:~# certbot –version

certbot 0.10.2

root@wordpress-vm:~#

と古かったので「apt-get dist-upgrade」でアップデートし、(dist-をつけないと「The following packages have been kept back:」でアップデートされない)

root@wordpress-vm:~# certbot –version

certbot 0.28.0

root@wordpress-vm:~# 

アップデートされました。

その後Apacheを落として、証明書の更新が出来るかを試したところ、

 root@wordpress-vm:~# certbot renew –dry-run –preferred-challenges http

Saving debug log to /var/log/letsencrypt/letsencrypt.log

– – – – – – – – – – – – – – – – – – – – – – – – – – – – – – – – – – – – – – – –

Processing /etc/letsencrypt/renewal/aoboshi.org.conf

– – – – – – – – – – – – – – – – – – – – – – – – – – – – – – – – – – – – – – – –

Cert not due for renewal, but simulating renewal for dry run

Plugins selected: Authenticator standalone, Installer apache

Renewing an existing certificate

Performing the following challenges:

http-01 challenge for aoboshi.org

Waiting for verification…

Cleaning up challenges

 – – – – – – – – – – – – – – – – – – – – – – – – – – – – – – – – – – – – – – –

new certificate deployed with reload of apache server; fullchain is

/etc/letsencrypt/live/aoboshi.org/fullchain.pem

– – – – – – – – – – – – – – – – – – – – – – – – – – – – – – – – – – – – – – – –

– – – – – – – – – – – – – – – – – – – – – – – – – – – – – – – – – – – – – – – –

Processing /etc/letsencrypt/renewal/www.aoboshi.org.conf

– – – – – – – – – – – – – – – – – – – – – – – – – – – – – – – – – – – – – – – –

Cert not due for renewal, but simulating renewal for dry run

Plugins selected: Authenticator webroot, Installer None

Renewing an existing certificate

Performing the following challenges:

http-01 challenge for www.aoboshi.org

Waiting for verification…

Cleaning up challenges

– – – – – – – – – – – – – – – – – – – – – – – – – – – – – – – – – – – – – – – –

new certificate deployed without reload, fullchain is

/etc/letsencrypt/live/www.aoboshi.org/fullchain.pem

– – – – – – – – – – – – – – – – – – – – – – – – – – – – – – – – – – – – – – – –

– – – – – – – – – – – – – – – – – – – – – – – – – – – – – – – – – – – – – – – –

** DRY RUN: simulating ‘certbot renew’ close to cert expiry

**          (The test certificates below have not been saved.)

Congratulations, all renewals succeeded. The following certs have been renewed:

  /etc/letsencrypt/live/aoboshi.org/fullchain.pem (success)

  /etc/letsencrypt/live/www.aoboshi.org/fullchain.pem (success)

** DRY RUN: simulating ‘certbot renew’ close to cert expiry

**          (The test certificates above have not been saved.)

– – – – – – – – – – – – – – – – – – – – – – – – – – – – – – – – – – – – – – – –

正常にアップデートできる結果になりました。

Debianを8(jessie)から9(stretch)にアップグレードする

前回OSアップグレード時に設定を壊してしまい、今後はBlue-Green Deploymentでアップデートすると言っていましたが、

せっかくなので再度直接OSアップグレードをやり直してみたところ、うまくいきました。

【やりかた】

1.sources.list及びsources.list.d配下の*.listファイルの編集

現状Debian 8であることを確認します。

$ cat /etc/os-release
PRETTY_NAME=”Debian GNU/Linux 8 (jessie)”
NAME=”Debian GNU/Linux”
VERSION_ID=”8″
VERSION=”8 (jessie)”
ID=debian
HOME_URL=”http://www.debian.org/”
SUPPORT_URL=”http://www.debian.org/support”
BUG_REPORT_URL=”https://bugs.debian.org/”
$

root@wordpress-vm:/etc/apt# ls -l
total 24
drwxr-xr-x 2 root root 4096 Nov 3 15:50 apt.conf.d
drwxr-xr-x 2 root root 4096 Apr 2 2018 preferences.d
-rw-r–r– 1 root root 412 Apr 11 2018 sources.list
drwxr-xr-x 2 root root 4096 Sep 30 06:13 sources.list.d
-rw-r–r– 1 root root 316 Apr 11 2018 sources.list.save
-rw-r–r– 1 root root 0 Sep 30 06:11 trusted.gpg
-rw-r–r– 1 root root 0 Apr 2 2018 trusted.gpg~
drwxr-xr-x 2 root root 4096 Apr 2 2018 trusted.gpg.d

root@wordpress-vm:/etc/apt# cat sources.list
deb http://deb.debian.org/debian/ jessie main
deb-src http://deb.debian.org/debian/ jessie main
deb http://security.debian.org/ jessie/updates main
deb-src http://security.debian.org/ jessie/updates main
deb http://deb.debian.org/debian/ jessie-updates main
deb-src http://deb.debian.org/debian/ jessie-updates main
deb http://http.debian.net/debian jessie main
deb-src http://http.debian.net/debian jessie main

root@wordpress-vm:/etc/apt# cp -ip sources.list sources.list_bk20181117
root@wordpress-vm:/etc/apt# ls -l
total 28
drwxr-xr-x 2 root root 4096 Nov 3 15:50 apt.conf.d
drwxr-xr-x 2 root root 4096 Apr 2 2018 preferences.d
-rw-r–r– 1 root root 412 Apr 11 2018 sources.list
-rw-r–r– 1 root root 412 Apr 11 2018 sources.list_bk20181117
drwxr-xr-x 2 root root 4096 Sep 30 06:13 sources.list.d
-rw-r–r– 1 root root 316 Apr 11 2018 sources.list.save
-rw-r–r– 1 root root 0 Sep 30 06:11 trusted.gpg
-rw-r–r– 1 root root 0 Apr 2 2018 trusted.gpg~
drwxr-xr-x 2 root root 4096 Apr 2 2018 trusted.gpg.d

root@wordpress-vm:/etc/apt#vi sources.list

:%s/jessie/stretch/g

「jessie」「stretch」で一括置換します。

root@wordpress-vm:/etc/apt# cat sources.list
deb http://deb.debian.org/debian/ stretch main
deb-src http://deb.debian.org/debian/ stretch main
deb http://security.debian.org/ stretch/updates main
deb-src http://security.debian.org/ stretch/updates main
deb http://deb.debian.org/debian/ stretch-updates main
deb-src http://deb.debian.org/debian/ stretch-updates main
deb http://http.debian.net/debian stretch main
deb-src http://http.debian.net/debian stretch main
root@wordpress-vm:/etc/apt#

/etc/apt/sources.list.dの*.listファイルに対しても同様に置換を実施します。

root@wordpress-vm:/etc/apt/sources.list.d# ls -l
total 24
-rw-r–r– 1 root root 174 Nov 19 05:59 backports.list
-rw-r–r– 1 root root 116 Apr 11 2018 backports.list.save
-rw-r–r– 1 root root 239 Nov 19 06:02 google-cloud.list
-rw-r–r– 1 root root 236 Apr 11 2018 google-cloud.list.save
-rw-r–r– 1 root root 74 Nov 19 06:35 google-cloud-logging.list
-rw-r–r– 1 root root 78 Nov 19 06:04 google-cloud-monitoring.list

2.アップグレード実行

# apt-get update

と

# apt-get dist-upgrade

を実施します。

apt-get dist-upgradeの際に下記の「Restart services during package upgrade without asking?」の表示が出たら「Yes」を選択します。

下記のApacheの設定変更の有無を聞かれたら「N」を選択します。(前回はここで「Y」にしてしまったので、設定が初期状態に戻ってしまったと思われます。

Grubについても「Keep the local version currently installed」を選択します。

全て完了後、rebootすれば完了です。
Debian 9(stretch)にアップグレードできました。

$ uname -a
Linux wordpress-vm 4.9.0-8-amd64 #1 SMP Debian 4.9.130-2 (2018-10-27) x86_64 GNU/Linux
$ cat /etc/issue
Debian GNU/Linux 9 \n \l

$ cat /etc/os-release
PRETTY_NAME=”Debian GNU/Linux 9 (stretch)”
NAME=”Debian GNU/Linux”
VERSION_ID=”9″
VERSION=”9 (stretch)”
ID=debian
HOME_URL=”https://www.debian.org/”
SUPPORT_URL=”https://www.debian.org/support”
BUG_REPORT_URL=”https://bugs.debian.org/”
$

その他
同様のやり方で、RaspberryPiのRaspbian(Debianベース)もアップグレードしました。

インスタンス壊してスナップショットで作り直しました…

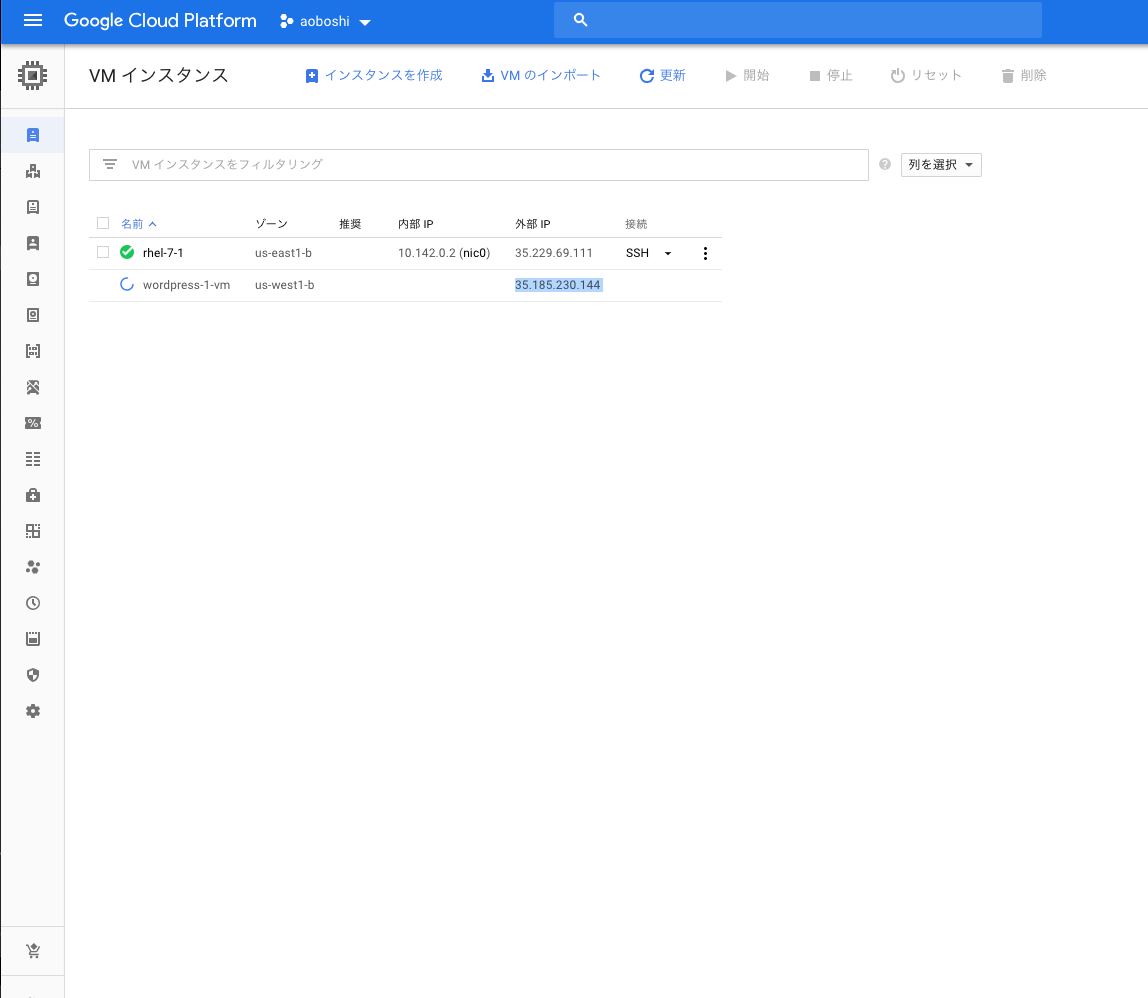
インスタンスのOSを最新ディストリビューションにしようと、apt-get dist-upgradeかけたら、
本Blogに繋がらなくなってしまいました…。
SSLまわりの設定が初期状態に戻ってしまったようです。

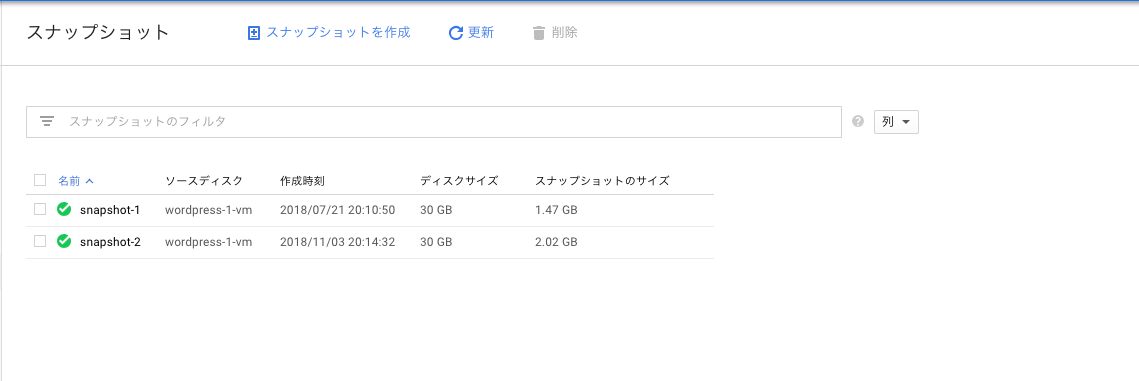
埒が明かないので、スナップショットからインスタンスを再作成しました。

apt-get dist-upgrade実行前にスナップショットをとっていたのでよかったです。

壊したインスタンスは削除します。

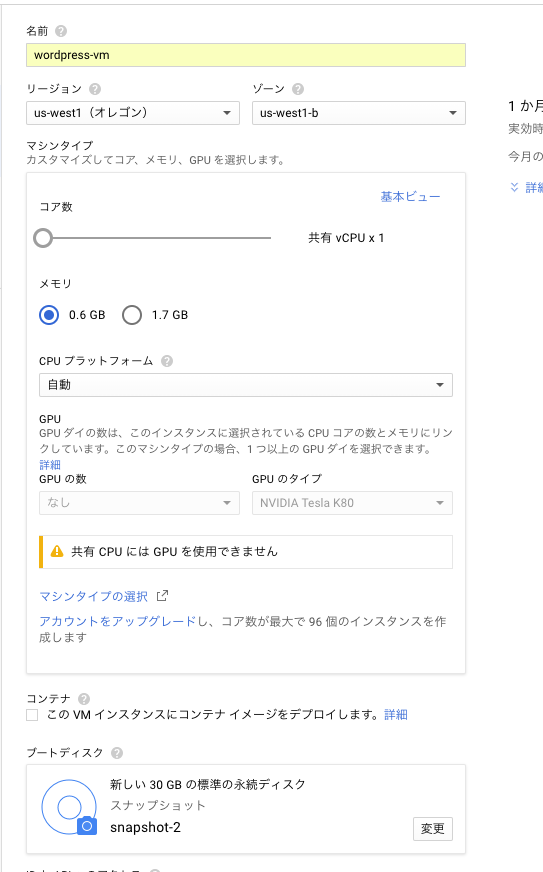
スナップショットの詳細画面から「インスタンスを作成」を選択します。

「名前」は前と同じ感じにしますが若干変えました。「マシンタイプ」は「コア数」と「メモリ」を前と同じようにします。
(f1-microと言う名前で選択が出来なくなったようなので、同じスペックを選択します。

「HTTPトラフィックを許可する」「HTTPSトラフィックを許可する」にチェックを入れます。

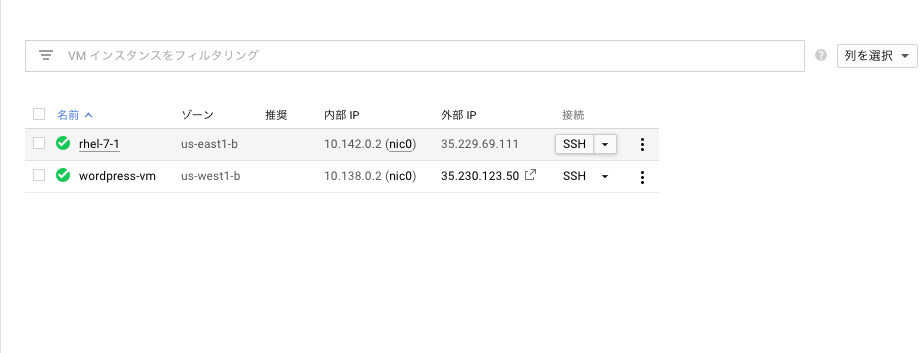
できました。

あとは、google domainsでDNSの設定したり、

SSLの設定をした時のように、/etc/hostsの設定を直したり、

$ cat /etc/hosts
127.0.0.1 localhost
::1 localhost ip6-localhost ip6-loopback
ff02::1 ip6-allnodes
ff02::2 ip6-allrouters

35.185.230.144 aoboshi.org
10.138.0.2 wordpress-vm.c.root-rock-210901.internal wordpress-vm # Added by Google
169.254.169.254 metadata.google.internal # Added by Google
$ sudo vi /etc/hosts
$ cat /etc/hosts
127.0.0.1 localhost
::1 localhost ip6-localhost ip6-loopback
ff02::1 ip6-allnodes
ff02::2 ip6-allrouters

35.230.123.50 aoboshi.org
10.138.0.2 wordpress-vm.c.root-rock-210901.internal wordpress-vm # Added by Google
169.254.169.254 metadata.google.internal # Added by Google
$

StackdriverのUptime check設定し直したりしました。

今後はOSのアップグレードなど大きい変更加える場合は、
直接手を入れるのではなく。新規に作り直してBlue-Green Deploymentを心がけようと思います…。

“First, it is not recommended to upgrade the OS in place. Instead you should deploy the application on an image of the next version.”
How to update from Debian 7 to Debian 8 on Google Compute Engine – Server Fault

GCE上のLinuxにswapを設定

Stackdriverを入れてから、oom-killerで(要はメモリ不足で)リブートが頻発するようになってしまいました。

Syslog上で下記のようなメッセージが毎日でています。

Oct 6 00:12:29 wordpress-1-vm kernel: [233585.430289] systemd invoked oom-killer: gfp_mask=0x201da, order=0, oom_score_adj=0
Oct 6 00:12:29 wordpress-1-vm kernel: [233585.438280] systemd cpuset=/ mems_allowed=0
Oct 6 00:12:29 wordpress-1-vm kernel: [233585.443040] CPU: 0 PID: 1 Comm: systemd Not tainted 3.16.0-5-amd64 #1 Debian 3.16.51-3+deb8u1
Oct 6 00:12:29 wordpress-1-vm kernel: [233585.451762] Hardware name: Google Google Compute Engine/Google Compute Engine, BIOS Google 01/01/2011
Oct 6 00:12:29 wordpress-1-vm kernel: [233585.461285] 0000000000000000 ffffffff8151f937 ffff8800243172d0 0000000000000000
Oct 6 00:12:29 wordpress-1-vm kernel: [233585.469363] ffffffff8151d53e 0000000000000000 ffffffff810d9edf 0000000000000000
Oct 6 00:12:29 wordpress-1-vm kernel: [233585.477435] ffffffff8152436e 0000000000000200 ffffffff8106a3c3 ffffffff810c7464
Oct 6 00:12:29 wordpress-1-vm kernel: [233585.485565] Call Trace:
Oct 6 00:12:29 wordpress-1-vm kernel: [233585.488215] [] ? dump_stack+0x5d/0x78
Oct 6 00:12:29 wordpress-1-vm kernel: [233585.493741] [] ? dump_header+0x76/0x1e8

Uptime Checkで頻繁にアクセスがあるのが原因と思い、

前回設定した「Alerting Policy」と「Uptime Check」設定を一旦削除、
「Check every」は「5 minutes(前回は1 minutes)」で再設定したところ、CPU使用量がやや下がりましたが、

Uptime Check 1minの状態

Uptime Check 5minに変更後

メモリは使用量は上に張り付いたままなので、

たしかに実メモリはAlways free上限の0.6GBで少ないけどswapがあるはずだからなあと、
確認したところ、

# free
total used free shared buffers cached
Mem: 608604 559076 49528 35132 4932 75128
-/+ buffers/cache: 479016 129588
Swap: 0 0 0

swapがありませんでした。

AWSとかでもそうらしいのですが、クラウドって基本的に「swapするなら代わりにもっと大きいインスタンスを使え」という考えらしいので、標準ではswapは設定されてないそうです。

でもそうも言ってられないので、swapの設定を入れてみます。
swap用のパーティションはないので、swapfileを作ってそこにswapするようにします。
ddでswapfileの元を作成します。
よく「swapは実メモリの2倍」などと聞きますが、実メモリが0.6GBと少ないので、2GBを指定します。

# dd if=/dev/zero of=/swapfile bs=1M count=2048
2048+0 records in
2048+0 records out
2147483648 bytes (2.1 GB) copied, 57.2575 s, 37.5 MB/s

事前の取りわすれてましたが、swapfile作成後もこれくらいディスクに余裕があれば、swapしても問題ないでしょう。

# df -h
Filesystem Size Used Avail Use% Mounted on
/dev/sda1 30G 5.9G 23G 21% /
udev 10M 0 10M 0% /dev
tmpfs 119M 13M 107M 11% /run
tmpfs 298M 0 298M 0% /dev/shm
tmpfs 5.0M 0 5.0M 0% /run/lock
tmpfs 298M 0 298M 0% /sys/fs/cgroup

swapfileはパーミッションが600以外だと警告が出るらしいので600にします。

# ls -l /swapfile
-rw-r–r– 1 root root 2147483648 Oct 9 06:50 /swapfile
# chmod 600 /swapfile
# ls -l /swapfile
-rw——- 1 root root 2147483648 Oct 9 06:50 /swapfile

mkswapコマンドで、ddで作成したファイルをswapfileとして使えるようにします。

# mkswap /swapfile
Setting up swapspace version 1, size = 2097148 KiB
no label, UUID=ebecbe3d-eed0-481c-91a3-68d047af03bb
#

swaponコマンドでswapfileを指定してswapを有効にします。

# swapon /swapfile

swapが有効になりました。

# free
total used free shared buffers cached
Mem: 608604 559676 48928 35132 2412 66292
-/+ buffers/cache: 490972 117632
Swap: 2097148 0 2097148

続いて、再起動した場合も自動でswapfileがマウントされるようにします。

fstabのバックアップをトって、

# cp -ip fstab fstab_20181009
# ls -l fstab*
-rw-r–r– 1 root root 62 Apr 2 2018 fstab
-rw-r–r– 1 root root 62 Apr 2 2018 fstab_20181009

viで開いて下記行を追加します。
「/swapfile swap swap defaults 0 0」

# cat fstab
UUID=c75f01ee-4a1b-45ab-90d0-942e1e36393a / ext4 defaults 1 1
/swapfile swap swap defaults 0 0

rebootして、swapが表示されることをもって、認識されることを確認します。
$ free
total used free shared buffers cached
Mem: 608604 527896 80708 26944 20248 145768
-/+ buffers/cache: 361880 246724
Swap: 2097148 0 2097148

swap設定後はメモリ使用量が上に張り付くことがなくなり、無事解決できました。

SSL証明書の更新をする

当ブログは常時SSL化をしていますが、期限切れまで1ヶ月を切ったので、9/24に更新をしてみました。

Let’s Encryptは「certbot renew」コマンドで更新が出来ます。
とりあえずそのまま打つと、

$ sudo certbot renew
Saving debug log to /var/log/letsencrypt/letsencrypt.log

——————————————————————————-
Processing /etc/letsencrypt/renewal/aoboshi.org.conf
——————————————————————————-
Cert is due for renewal, auto-renewing…
Starting new HTTPS connection (1): acme-v01.api.letsencrypt.org
Renewing an existing certificate
Performing the following challenges:
tls-sni-01 challenge for aoboshi.org

——————————————————————————-
The program apache2 (process ID 26473) is already listening on TCP port 443.
This will prevent us from binding to that port. Please stop the apache2 program

temporarily and then try again. For automated renewal, you may want to use a
script that stops and starts your webserver. You can find an example at
https://certbot.eff.org/docs/using.html#renewal . Alternatively you can use the
webroot plugin to renew without needing to stop and start your webserver.
——————————————————————————-
Cleaning up challenges
Attempting to renew cert from /etc/letsencrypt/renewal/aoboshi.org.conf produced an unexpected error: At least one
of the required ports is already taken.. Skipping.

——————————————————————————-
Processing /etc/letsencrypt/renewal/www.aoboshi.org.conf
——————————————————————————-
Cert not yet due for renewal

The following certs are not due for renewal yet:
/etc/letsencrypt/live/www.aoboshi.org/fullchain.pem (skipped)
All renewal attempts failed. The following certs could not be renewed:
/etc/letsencrypt/live/aoboshi.org/fullchain.pem (failure)
1 renew failure(s), 0 parse failure(s)
$

apacheを落としてくださいと表示をされたので、「systemctl stop apache2」で停止、

再度実施すると、

$ sudo certbot renew
Saving debug log to /var/log/letsencrypt/letsencrypt.log

——————————————————————————-
Processing /etc/letsencrypt/renewal/aoboshi.org.conf
——————————————————————————-
Cert is due for renewal, auto-renewing…
Starting new HTTPS connection (1): acme-v01.api.letsencrypt.org
Renewing an existing certificate
Performing the following challenges:
tls-sni-01 challenge for aoboshi.org
/usr/lib/python2.7/dist-packages/OpenSSL/rand.py:58: UserWarning: implicit cast from ‘char *’ to a different pointe
r type: will be forbidden in the future (check that the types are as you expect; use an explicit ffi.cast() if they
are correct)
result_code = _lib.RAND_bytes(result_buffer, num_bytes)
Waiting for verification…
Cleaning up challenges
Generating key (2048 bits): /etc/letsencrypt/keys/0002_key-certbot.pem
Creating CSR: /etc/letsencrypt/csr/0002_csr-certbot.pem

——————————————————————————-
new certificate deployed with reload of apache server; fullchain is
/etc/letsencrypt/live/aoboshi.org/fullchain.pem
——————————————————————————-

——————————————————————————-
Processing /etc/letsencrypt/renewal/www.aoboshi.org.conf
——————————————————————————-
Cert not yet due for renewal

The following certs are not due for renewal yet:
/etc/letsencrypt/live/www.aoboshi.org/fullchain.pem (skipped)
Congratulations, all renewals succeeded. The following certs have been renewed:
/etc/letsencrypt/live/aoboshi.org/fullchain.pem (success)

$

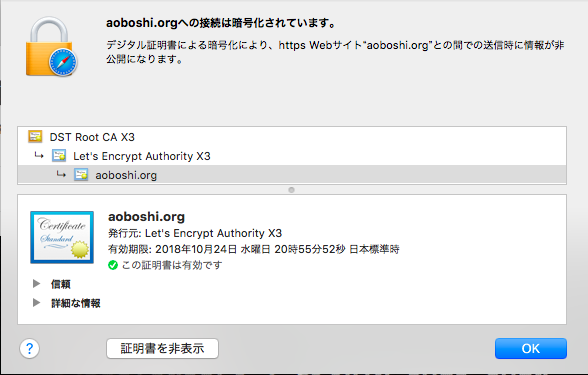
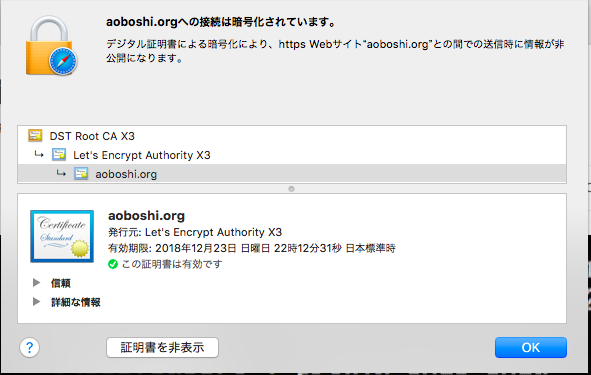
「aoboshi.org」の証明書更新は問題なくできました。
「www.aoboshi.org」に関しましては、1ヶ月以上期限があるので更新不要とスキップされました。

その後、落としたapacheを「systemctl start apache2」で立ち上げてもWebサイトに接続できなくなりましたが、
「systemctl restart apache2」で再起動したら無事接続できるようになりました。

数日後、www.aoboshi.orgの証明書も更新しようと思い、
まず「certbot certificates」で証明書の状態を確認したところ、

# certbot certificates
Saving debug log to /var/log/letsencrypt/letsencrypt.log

——————————————————————————-
Found the following certs:
Certificate Name: aoboshi.org
Domains: aoboshi.org
Expiry Date: 2018-12-23 13:12:31+00:00 (VALID: 85 days)
Certificate Path: /etc/letsencrypt/live/aoboshi.org/fullchain.pem
Private Key Path: /etc/letsencrypt/live/aoboshi.org/privkey.pem
Certificate Name: www.aoboshi.org
Domains: www.aoboshi.org
Expiry Date: 2018-12-26 11:21:35+00:00 (VALID: 88 days)

Certificate Path: /etc/letsencrypt/live/www.aoboshi.org/fullchain.pem
Private Key Path: /etc/letsencrypt/live/www.aoboshi.org/privkey.pem
——————————————————————————-
#

www.aoboshi.orgについても更新がされていました。
更新をした覚えはないので調べたところ、

$ sudo systemctl list-timers
NEXT LEFT LAST PASSED UNIT AC
Sun 2018-09-30 09:03:46 UTC 4h 5min left Sat 2018-09-29 09:03:46 UTC 19h ago systemd-tmpfiles-clean.timer sy
Sun 2018-09-30 12:00:00 UTC 7h left Sun 2018-09-30 00:00:01 UTC 4h 57min ago certbot.timer ce
2 timers listed.
Pass –all to see loaded but inactive timers, too.
$

日次でアップデートを実行する設定がLet’s Encrypt設定時にsystemdに組み込まれていたので、自動で更新されていたことがわかりました。

SSL接続をさらにsecureへ

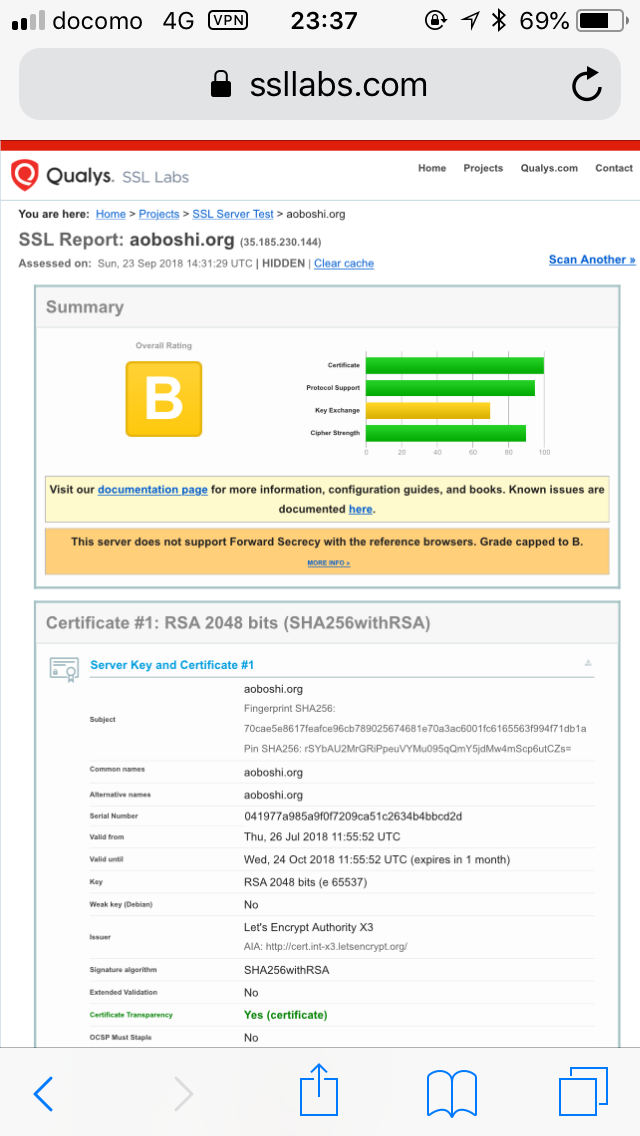
当ブログは常時SSL化をしておりますが、SSL Server Test (Powered by Qualys SSL Labs)で診断を行ったところ、

結果が一部不備がある「B」を判定されてしまいました。

どうやら、Forward secrecyと言うものが有効になっていないのが問題でした。

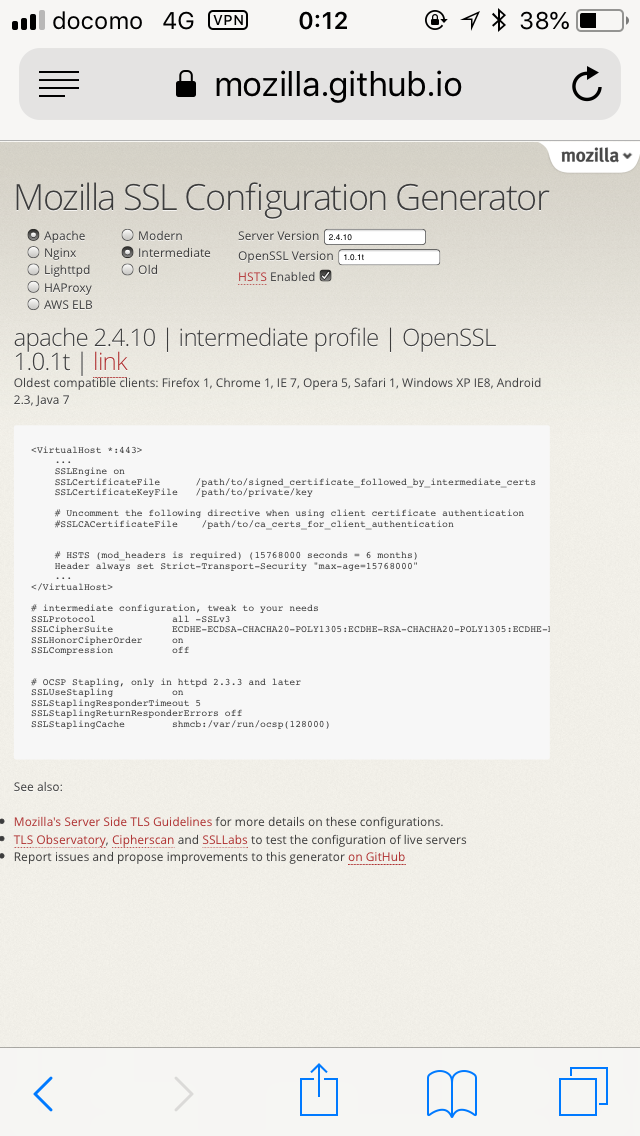
設定方法を調べたところ、Mozillaが設定ジェネレータを用意していることを知り、
Generate Mozilla Security Recommended Web Server Configuration Files

早速、使用しているソフトとそのバージョンを入力し、設定を作成、

# intermediate configuration, tweak to your needs
SSLProtocol all -SSLv3
SSLCipherSuite ECDHE-ECDSA-CHACHA20-POLY1305:ECDHE-RSA-CHACHA20-POLY1305:ECDHE-ECDSA-AES128-GCM-SHA256:ECDHE-RSA-AES128-GCM-SHA256:ECDHE-ECDSA-AES256-GCM-SHA384:ECDHE-RSA-AES256-GCM-SHA384:DHE-RSA-AES128-GCM-SHA256:DHE-RSA-AES256-GCM-SHA384:ECDHE-ECDSA-AES128-SHA256:ECDHE-RSA-AES128-SHA256:ECDHE-ECDSA-AES128-SHA:ECDHE-RSA-AES256-SHA384:ECDHE-RSA-AES128-SHA:ECDHE-ECDSA-AES256-SHA384:ECDHE-ECDSA-AES256-SHA:ECDHE-RSA-AES256-SHA:DHE-RSA-AES128-SHA256:DHE-RSA-AES128-SHA:DHE-RSA-AES256-SHA256:DHE-RSA-AES256-SHA:ECDHE-ECDSA-DES-CBC3-SHA:ECDHE-RSA-DES-CBC3-SHA:EDH-RSA-DES-CBC3-SHA:AES128-GCM-SHA256:AES256-GCM-SHA384:AES128-SHA256:AES256-SHA256:AES128-SHA:AES256-SHA:DES-CBC3-SHA:!DSS
SSLHonorCipherOrder on
SSLCompression off

# OCSP Stapling, only in httpd 2.3.3 and later
SSLUseStapling on
SSLStaplingResponderTimeout 5
SSLStaplingReturnResponderErrors off
SSLStaplingCache shmcb:/var/run/ocsp(128000)

の部分をコピーし、

サーバ上のコンフィグの直下に貼り付けて、
apacheの再起動を行ったところ、

無事に「A」判定になりました。

気味の悪いアクセス【phpMyAdminを狙った攻撃】

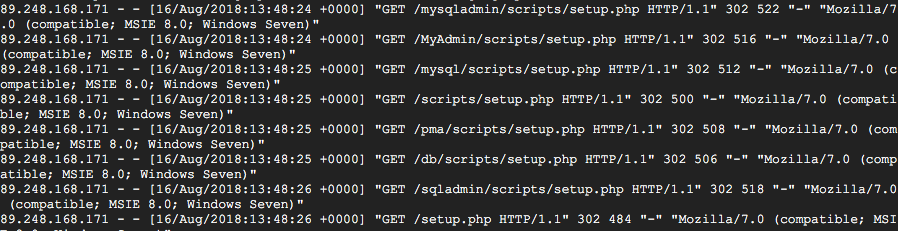
apacheのログを見ていたら、気味の悪いアクセスが…。

scriptsディレクトリ配下のsetup.phpを探しているようです。

調べてみると、どうやらphpMyAdminを狙った攻撃(をするためのスキャン)の可能性が高いことがわかりました…。

古いバージョンを狙ったものなので、とりあえず大丈夫そうですが、

とりあえずGCPのFWで該当IPアドレスをブロック(焼け石に何とかですが)し、
。

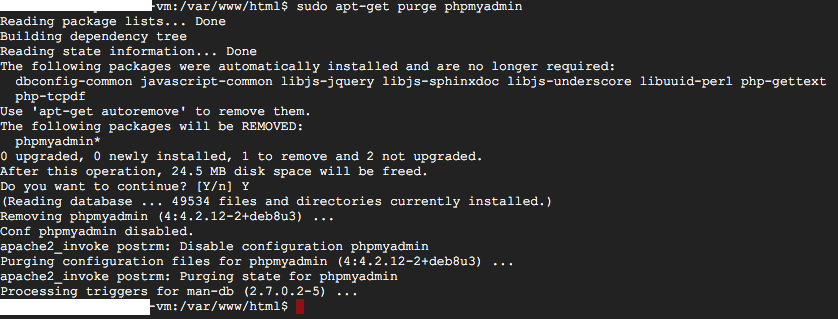
phpmyadminは普段使わないので、念のためアンインストールしました。

$ sudo apt-get purge phpmyadmin


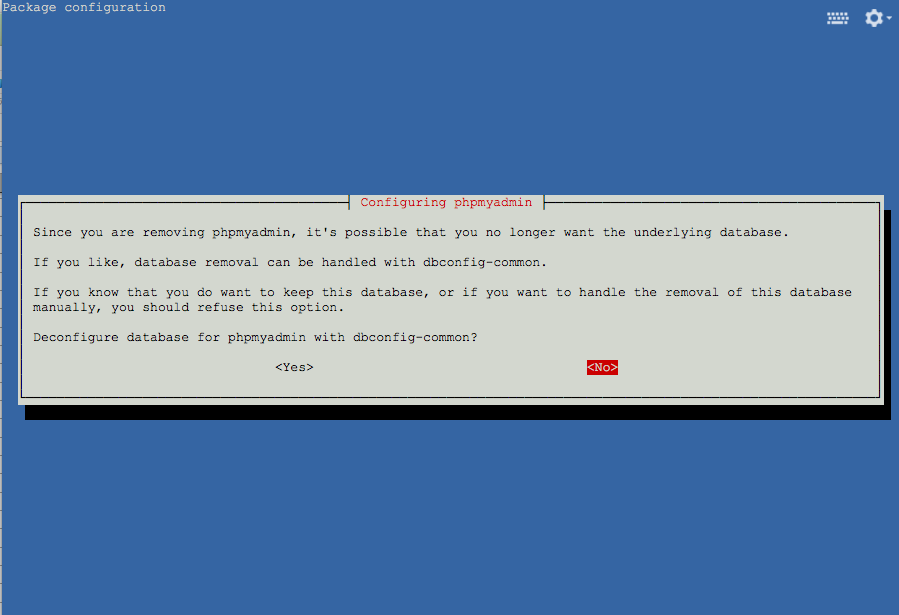
途中で、「MySQLのデータベースも消すか?データベースを残しときたいか、手動で消したい場合は拒否しとけよ!」(雑訳)
みたいなこと聞かれるので「NO」を選択。

無事削除できました。

こんな弱小ブログにもこういうのがくるんだなと思いました。

www.aoboshi.orgも常時SSL化

前回、Let’s encryptで本ブログを常時SSL化したことをお伝えしましたが、
本ブログは、https://aoboshi.orgだけではなく、サブドメイン付きのhttps://aoboshi.orgでも接続できるのですが、

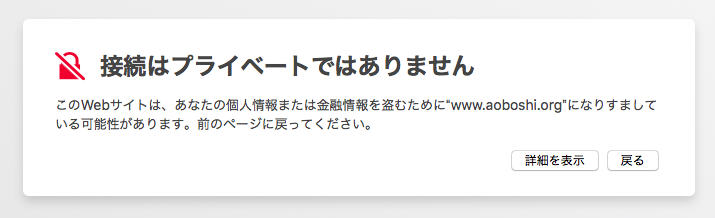
https://aoboshi.orgで接続しようとすると、

「接続としているドメインと証明書のドメインが合ってない」と警告メッセージが表示されるようになってしまいました。

前回証明書を取得した際に、aoboshi.orgしか指定しておらず、www.aoboshi.orgを指定していなかったのが原因のようです。

前回、httpで接続してきたらhttpsにリダイレクトするように設定した設定に、
www.aoboshi.orgで接続してきたらaoboshi.orgにリダイレクトする条件を追加しましたが、
/etc/apache2/sites-available/wordpress.conf

RewriteEngine On
RewriteCond %{HTTPS} off
RewriteRule ^(.*)$ https://%{HTTP_HOST}%{REQUEST_URI} [R,L]

↓太字部分を追加

RewriteEngine On
RewriteCond %{HTTP_HOST} ^www.aoboshi.org$ [OR]
RewriteCond %{HTTPS} off
RewriteRule ^(.*)$ https://%{HTTP_HOST}%{REQUEST_URI} [R,L]

状態は変わりませんでした。

そこで、www.aoboshi.org用に証明書を取り直し、バーチャルホストの設定を追加することにしました。

1.証明書取得
www.aoboshi.org用の証明書を取得します。

まずapacheを停止。

$ systemctl stop apache2

下記コマンドで証明書を取得します。

$ sudo certbot certonly –webroot -w /var/www/html -d www.aoboshi.org
Saving debug log to /var/log/letsencrypt/letsencrypt.log
Starting new HTTPS connection (1): acme-v01.api.letsencrypt.org
Obtaining a new certificate
Performing the following challenges:
http-01 challenge for www.aoboshi.org
Using the webroot path /var/www/html for all unmatched domains.
Waiting for verification…
Cleaning up challenges
Generating key (2048 bits): /etc/letsencrypt/keys/0001_key-certbot.pem
Creating CSR: /etc/letsencrypt/csr/0001_csr-certbot.pem

IMPORTANT NOTES:
– Congratulations! Your certificate and chain have been saved at
/etc/letsencrypt/live/www.aoboshi.org/fullchain.pem. Your cert will
expire on 2018-10-27. To obtain a new or tweaked version of this
certificate in the future, simply run certbot again. To
non-interactively renew *all* of your certificates, run “certbot
renew”
– If you like Certbot, please consider supporting our work by:

Donating to ISRG / Let’s Encrypt: https://letsencrypt.org/donate
Donating to EFF: https://eff.org/donate-le

2.バーチャルホストの設定
前回https用にバーチャルホストを設定したdefault-ssl.confに、www.aoboshi.org用のバーチャルホストを設定しようと思ったのですが、1ファイルに混在していると分かりにくいので、コピーして該当箇所のみ変更しました。

www.aoboshi.org用にwwwdefault-ssl.confを作成

$ pwd
/etc/apache2/sites-available
$ cp -ip default-ssl.conf wwwdefault-ssl.conf
vi wwwdefault-ssl.conf

ServerNameとSSL証明書の置き場所のみ変更する。

$ diff default-ssl.conf wwwdefault-ssl.conf
3c3
< ServerName aoboshi.org --- > ServerName www.aoboshi.org
33,34c33,34
< SSLCertificateFile /etc/letsencrypt/live/aoboshi.org/fullchain.pem < SSLCertificateKeyFile /etc/letsencrypt/live/aoboshi.org/privkey.pem --- > SSLCertificateFile /etc/letsencrypt/live/www.aoboshi.org/fullchain.pem
> SSLCertificateKeyFile /etc/letsencrypt/live/www.aoboshi.org/privkey.pem
naoto70@wordpress-1-vm:/etc/apache2/sites-available$

wwwdefault-ssl.confを下記コマンドで有効化します。

$ sudo a2ensite wwwdefault-ssl.conf
Enabling site wwwdefault-ssl.
To activate the new configuration, you need to run:
service apache2 reload

最後にapacheを起動すれば完了です。

$ systemctl start apache2

これで、www.aoboshi.orgで接続が出来るようになりました。

【2018/9/23追記】

aoboshi.orgまたはwww.aoboshi.org以外のサブドメイン以外の、SSL証明書の存在しない存在しないサブドメインでhttp://〜をhttps://〜にリダイレクトしないよう、wordpress.confのリダイレクトの設定を下記に書き換えました。
(太字が変更場所)

RewriteEngine On
RewriteCond %{HTTP_HOST} ^www.aoboshi.org$ [OR]
RewriteCond %{HTTP_HOST} ^aoboshi.org$
RewriteRule ^(.*)$ https://%{HTTP_HOST}%{REQUEST_URI} [R,L]

[どうにか完了]Let’s Encrypt導入に悪戦苦闘

最近ブログを更新しようとWordpressにログインしようとするとSafariのURL表示のところに「Webサイトが安全ではありません」と表示されるようになってしまいました。

http接続のためだそうですが、いくら自分のサイトだからといって正直気になります。

また、最近はChromeがhttp接続の場合はログイン時に限らず警告を表示するようになるなど、

「Google Chrome 68」公開、HTTPサイトには容赦なく警告を表示する仕様に – INTERNET Watch

httpsが標準になりつつある時代になってきたこともあり、

当ブログでもLet’s Encryptを使用して常時https化してみました。

Wikipediaに
「LinuxのWebサーバーでは、HTTPSの暗号化の設定および証明書の取得・更新がわずか2つのコマンドによって可能である。」
と書いてあるなど、結構簡単にできると書いている方が多かったですが、自分の場合は結構手間取ったので、作業履歴を書いていきたいと思います。

1.certbotのインストール

Let’s Encryptでhttps化に必要な証明書を取得し設定するのにcertbotというソフトを入れる必要があるので、インストールをします。
基本的にdebianはapt-getでインストールできるらしいのですが、
Debian 8 (jessie)では、リポジトリの追加が必要との情報があり、確認してみたところ、

$ cat /etc/os-release
PRETTY_NAME=”Debian GNU/Linux 8 (jessie)”
NAME=”Debian GNU/Linux”
VERSION_ID=”8″
VERSION=”8 (jessie)”
ID=debian
HOME_URL=”http://www.debian.org/”
SUPPORT_URL=”http://www.debian.org/support”
BUG_REPORT_URL=”https://bugs.debian.org/”
$

私が使用していたのもDebian 8 (jessie)でしたので、まずリポジトリの追加を行いました。

$ cd /etc/apt/sources.list.d/
$ sudo vi backports.list

下記の1行を追加

deb http://ftp.debian.org/debian jessie-backports main

certbotのインストール

$ sudo apt-get update
$ sudo apt-get install python-certbot-apache -t jessie-backports

2-1.certbotの起動・設定(失敗)

certbotを入れた終わったらcertbotを起動し、設定します。

$ sudo certbot –apache
Saving debug log to /var/log/letsencrypt/letsencrypt.log
No names were found in your configuration files. Please enter in your domain
name(s) (comma and/or space separated) (Enter ‘c’ to cancel):aoboshi.org ←ドメイン名を入れる
Enter email address (used for urgent renewal and security notices) (Enter ‘c’ to
cancel):xxxxxx@gmail.com←自分のメールアドレスを入れる
Starting new HTTPS connection (1): acme-v01.api.letsencrypt.org

——————————————————————————-
Please read the Terms of Service at
https://letsencrypt.org/documents/LE-SA-v1.2-November-15-2017.pdf. You must
agree in order to register with the ACME server at
https://acme-v01.api.letsencrypt.org/directory
——————————————————————————-
(A)gree/(C)ancel:

(A)gree/(C)ancel: A←同意する
Obtaining a new certificate
Performing the following challenges:
Client with the currently selected authenticator does not support any combination of challenges that will satisfy the CA.

IMPORTANT NOTES:
– If you lose your account credentials, you can recover through
e-mails sent to xxxxxxx@gmail.com.
– Your account credentials have been saved in your Certbot
configuration directory at /etc/letsencrypt. You should make a
secure backup of this folder now. This configuration directory will
also contain certificates and private keys obtained by Certbot so
making regular backups of this folder is ideal.
$

なぜかエラーを吐いて落ちました。
やり直しても同じでした。

2-1.certbotの起動・設定・復旧

調べたところ別のコマンドで代用できるそうでしたのでやってみました。
apacheを止める必要があるので、止めます。

$ sudo systemctl stop apache2

standaloneモードでcertbotを起動。-d オプションの後に自分のドメイン名を指定します。

$ sudo certbot –authenticator standalone –installer apache -d aoboshi.org

Saving debug log to /var/log/letsencrypt/letsencrypt.log
Starting new HTTPS connection (1): acme-v01.api.letsencrypt.org
Cert not yet due for renewal

You have an existing certificate that has exactly the same domains or certificate name you requested and isn’t clos
e to expiry.
(ref: /etc/letsencrypt/renewal/aoboshi.org.conf)

What would you like to do?
——————————————————————————-
1: Attempt to reinstall this existing certificate
2: Renew & replace the cert (limit ~5 per 7 days)
——————————————————————————-
Select the appropriate number [1-2] then [enter] (press ‘c’ to cancel): 1 ←中途半端に入ってしまったみたいなので入れ直す
Keeping the existing certificate

We were unable to find a vhost with a ServerName or Address of aoboshi.org.
Which virtual host would you like to choose?
(note: conf files with multiple vhosts are not yet supported)
——————————————————————————-
1: 000-default.conf | | |

2: default-ssl.conf | | HTTPS |
3: wordpress.conf | | | Enabled
——————————————————————————-
Select the appropriate number [1-3] then [enter] (press ‘c’ to cancel): 2 ←https用のバーチャルホストの設定をどのファイルに入れるのかを指定する。とりあえずそれっぽいのを指定
Enabled Apache socache_shmcb module
Enabled Apache ssl module
Deploying Certificate to VirtualHost /etc/apache2/sites-available/default-ssl.conf
Enabling available site: /etc/apache2/sites-available/default-ssl.conf

Please choose whether HTTPS access is required or optional.
——————————————————————————-
1: Easy – Allow both HTTP and HTTPS access to these sites
2: Secure – Make all requests redirect to secure HTTPS access
——————————————————————————-
Select the appropriate number [1-2] then [enter] (press ‘c’ to cancel): 2 ←httpでアクセスしてきたらhttpsにリダイレクトさせる
Created redirect file: le-redirect-aoboshi.org.conf
Rollback checkpoint is empty (no changes made?)

——————————————————————————-
Congratulations! You have successfully enabled https://aoboshi.org

You should test your configuration at:
https://www.ssllabs.com/ssltest/analyze.html?d=aoboshi.org
——————————————————————————-
$

apacheを立ち上げて、さあ確認。

$ sudo systemctl start apache2

…ブログに繋がらない状態になりました。httpsはおろかhttpsでも…。

試行錯誤した結果、/etc/hostsにホスト名とIPアドレスを入れたら復旧しました。

$ cd /etc
$ vi hosts

35.185.230.144 aoboshi.org

一応URLをhttpsにしても繋がるようになりました。

3.仕上げ
【リンクの修正】
https://aoboshi.org

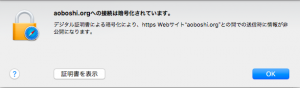
で繋がるようになったのはいいのですが、SafariのURLバーに南京錠アイコンがつきません。
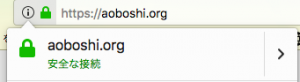
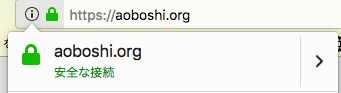
Firefoxで見てみたところ、
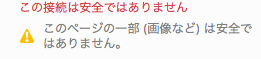
どうやら、画像指定がhttpで書いているため、httpsとhttpが混在していたようです。
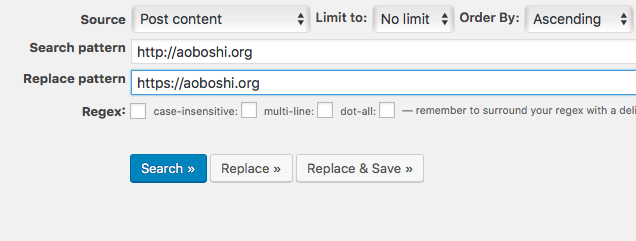
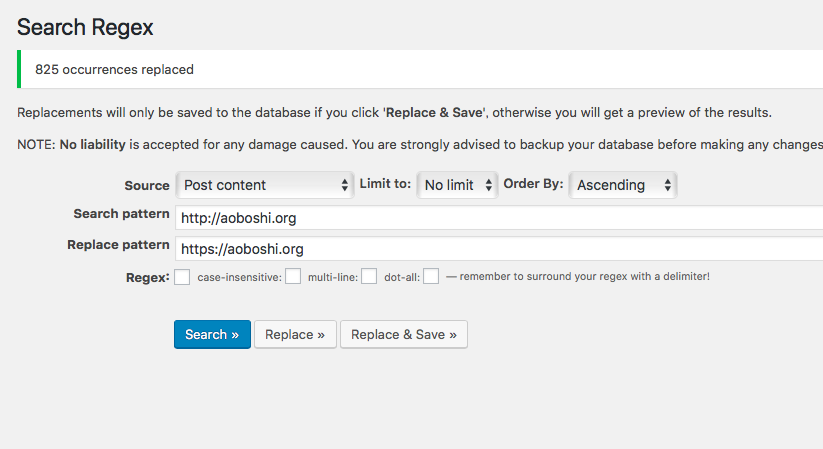
以前も使用したSearch Regexで一括置換します。
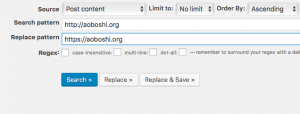
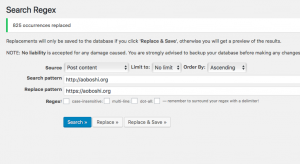
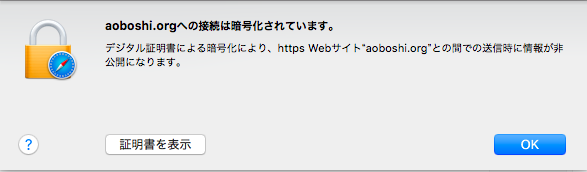
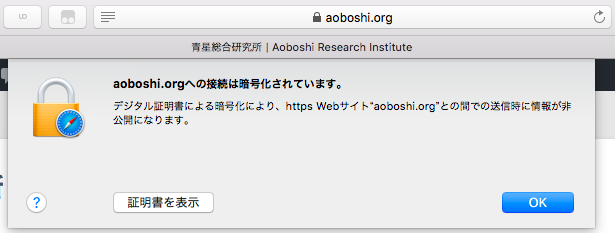
置換後、Safari、Firefoxともにhttps接続である表示がされるようになりました。
  

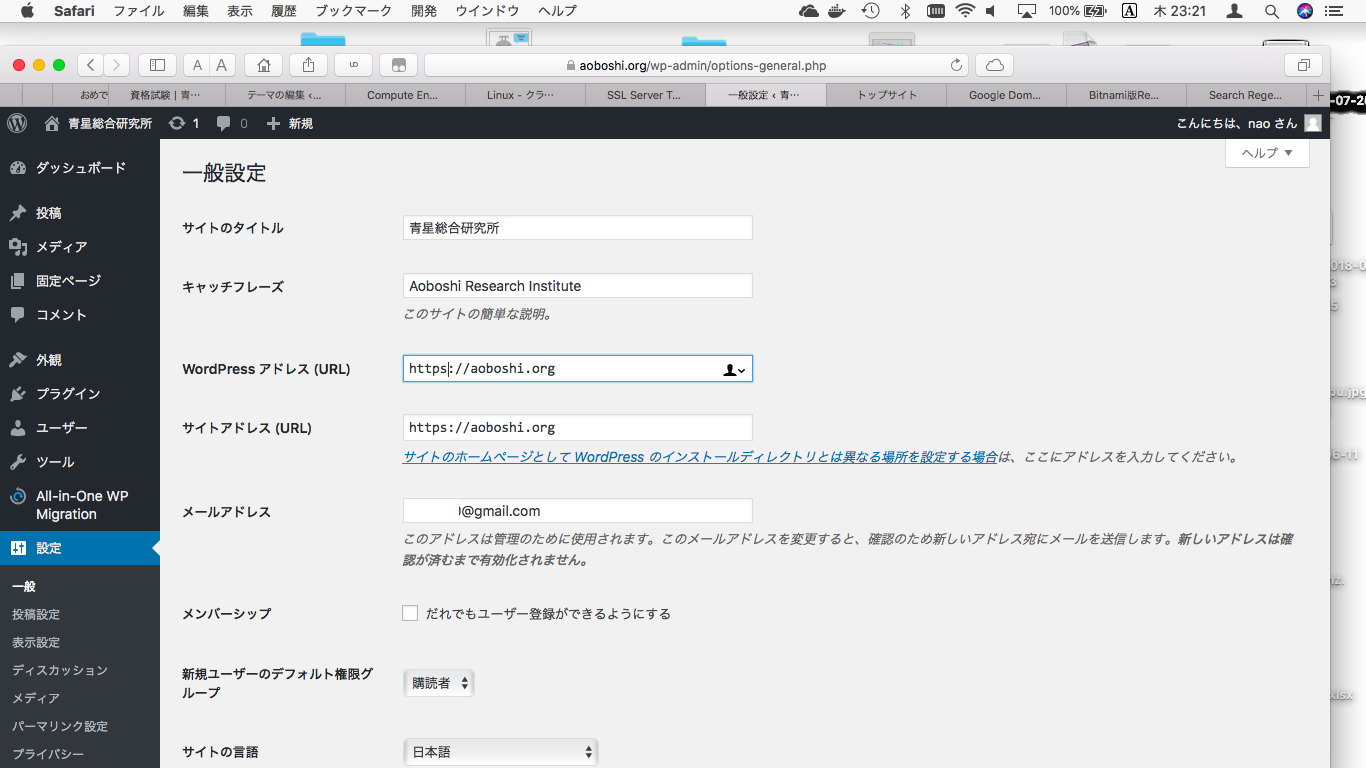
WordPressのアドレス設定もhttpsに変えます。

【httpで接続してきたらhttpsにリダイレクトするようにする】
上記にも書いていますがcertbotで設定した際に

Please choose whether HTTPS access is required or optional.
——————————————————————————-
1: Easy – Allow both HTTP and HTTPS access to these sites
2: Secure – Make all requests redirect to secure HTTPS access
——————————————————————————-
Select the appropriate number [1-2] then [enter] (press ‘c’ to cancel):2

httpで接続してきたらhttpsにリダイレクトするようにする設定をしたはずなのに、httpでアクセスしてもhttpsになりません。
いろいろ調べた結果、バーチャルホストの設定が正常に入っていないのが原因であるようだとわかりました。
certbotも「We were unable to find a vhost with a ServerName or Address of aoboshi.org.」と言ってましたし。

/etc/apache2/sites-available/wordpress.conf
には、

と、http用の設定が入っているようなので、

に下記4行を追加してapacheを再起動したところ、

ServerName aoboshi.org
RewriteEngine On
RewriteCond %{HTTPS} off
RewriteRule ^(.*)$ https://%{HTTP_HOST}%{REQUEST_URI} [R,L]

httpで接続してきたらhttpsにリダイレクトするようにするようになりました。

ついでに、

とhttps用の設定が入っている
/etc/apache2/sites-available/default-ssl.conf
にも
ServerName aoboshi.org
の1行が入ってなかったので入れました。

長々と書きましたが、なんとかhttps化することが出来ました。

4.その他、更新について
Let’s encryptで取得した証明書の期限は90日なので定期的に更新が必要です。
certbot renewコマンドで更新できるようなので、やってみようとしましたが、

$ sudo certbot renew
Saving debug log to /var/log/letsencrypt/letsencrypt.log

——————————————————————————-
Processing /etc/letsencrypt/renewal/aoboshi.org.conf
——————————————————————————-
Cert not yet due for renewal

The following certs are not due for renewal yet:
/etc/letsencrypt/live/aoboshi.org/fullchain.pem (skipped)
No renewals were attempted.

まだ期限じゃないから必要ないですよとスキップされます(まだ導入して数日ですし)。

systemdの設定を見ると、定期的に更新する設定が入っているようなので、静観です。

$ cd /lib/systemd/system/
$ cat certbot.timer
[Unit]
Description=Run certbot twice daily
[Timer]
OnCalendar=*-*-* 00,12:00:00
Persistent=true
[Install]
WantedBy=timers.target

$ cat /lib/systemd/system/certbot.service
[Unit]
Description=Certbot
Documentation=file:///usr/share/doc/python-certbot-doc/html/index.html
Documentation=https://letsencrypt.readthedocs.io/en/latest/
[Service]
Type=oneshot
ExecStartPre=/usr/bin/perl -e ‘sleep int(rand(3600))’
ExecStart=/usr/bin/certbot -q renew
PrivateTmp=true