
前回、Let’s encryptで本ブログを常時SSL化したことをお伝えしましたが、
本ブログは、https://aoboshi.orgだけではなく、サブドメイン付きのhttps://aoboshi.orgでも接続できるのですが、
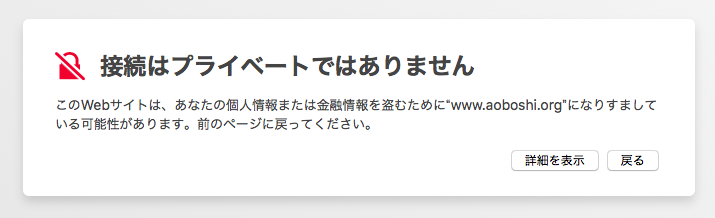
https://aoboshi.orgで接続しようとすると、
「接続としているドメインと証明書のドメインが合ってない」と警告メッセージが表示されるようになってしまいました。
前回証明書を取得した際に、aoboshi.orgしか指定しておらず、www.aoboshi.orgを指定していなかったのが原因のようです。
前回、httpで接続してきたらhttpsにリダイレクトするように設定した設定に、
www.aoboshi.orgで接続してきたらaoboshi.orgにリダイレクトする条件を追加しましたが、
/etc/apache2/sites-available/wordpress.conf
RewriteEngine On
RewriteCond %{HTTPS} off
RewriteRule ^(.*)$ https://%{HTTP_HOST}%{REQUEST_URI} [R,L]
↓太字部分を追加
RewriteEngine On
RewriteCond %{HTTP_HOST} ^www.aoboshi.org$ [OR]
RewriteCond %{HTTPS} off
RewriteRule ^(.*)$ https://%{HTTP_HOST}%{REQUEST_URI} [R,L]
状態は変わりませんでした。
そこで、www.aoboshi.org用に証明書を取り直し、バーチャルホストの設定を追加することにしました。
1.証明書取得
www.aoboshi.org用の証明書を取得します。
まずapacheを停止。
$ systemctl stop apache2
下記コマンドで証明書を取得します。
$ sudo certbot certonly –webroot -w /var/www/html -d www.aoboshi.org
Saving debug log to /var/log/letsencrypt/letsencrypt.log
Starting new HTTPS connection (1): acme-v01.api.letsencrypt.org
Obtaining a new certificate
Performing the following challenges:
http-01 challenge for www.aoboshi.org
Using the webroot path /var/www/html for all unmatched domains.
Waiting for verification…
Cleaning up challenges
Generating key (2048 bits): /etc/letsencrypt/keys/0001_key-certbot.pem
Creating CSR: /etc/letsencrypt/csr/0001_csr-certbot.pem
IMPORTANT NOTES:
– Congratulations! Your certificate and chain have been saved at
/etc/letsencrypt/live/www.aoboshi.org/fullchain.pem. Your cert will
expire on 2018-10-27. To obtain a new or tweaked version of this
certificate in the future, simply run certbot again. To
non-interactively renew *all* of your certificates, run “certbot
renew”
– If you like Certbot, please consider supporting our work by:
Donating to ISRG / Let’s Encrypt: https://letsencrypt.org/donate
Donating to EFF: https://eff.org/donate-le
2.バーチャルホストの設定
前回https用にバーチャルホストを設定したdefault-ssl.confに、www.aoboshi.org用のバーチャルホストを設定しようと思ったのですが、1ファイルに混在していると分かりにくいので、コピーして該当箇所のみ変更しました。
www.aoboshi.org用にwwwdefault-ssl.confを作成
$ pwd
/etc/apache2/sites-available
$ cp -ip default-ssl.conf wwwdefault-ssl.conf
vi wwwdefault-ssl.conf
ServerNameとSSL証明書の置き場所のみ変更する。
$ diff default-ssl.conf wwwdefault-ssl.conf
3c3
< ServerName aoboshi.org
---
> ServerName www.aoboshi.org
33,34c33,34
< SSLCertificateFile /etc/letsencrypt/live/aoboshi.org/fullchain.pem
< SSLCertificateKeyFile /etc/letsencrypt/live/aoboshi.org/privkey.pem
---
> SSLCertificateFile /etc/letsencrypt/live/www.aoboshi.org/fullchain.pem
> SSLCertificateKeyFile /etc/letsencrypt/live/www.aoboshi.org/privkey.pem
naoto70@wordpress-1-vm:/etc/apache2/sites-available$
wwwdefault-ssl.confを下記コマンドで有効化します。
$ sudo a2ensite wwwdefault-ssl.conf
Enabling site wwwdefault-ssl.
To activate the new configuration, you need to run:
service apache2 reload
最後にapacheを起動すれば完了です。
$ systemctl start apache2
これで、www.aoboshi.orgで接続が出来るようになりました。
【2018/9/23追記】
aoboshi.orgまたはwww.aoboshi.org以外のサブドメイン以外の、SSL証明書の存在しない存在しないサブドメインでhttp://〜をhttps://〜にリダイレクトしないよう、wordpress.confのリダイレクトの設定を下記に書き換えました。
(太字が変更場所)
RewriteEngine On
RewriteCond %{HTTP_HOST} ^www.aoboshi.org$ [OR]
RewriteCond %{HTTP_HOST} ^aoboshi.org$
RewriteRule ^(.*)$ https://%{HTTP_HOST}%{REQUEST_URI} [R,L]