GCPで一定額以上使った場合に通知が行くように、予算の設定をしました。
コンソールページから、「お支払い」→「予算とアラート」→「予算を作成」を選択し、

「予算名」を入力し、「予算額」は「指定額」を入力し、金額を入力、「保存」を選択

するとどのくらい使っているか表示されるようになりました。

【追記】
予算のしきい値を超えるとメールで通知が来ます。

GCPで一定額以上使った場合に通知が行くように、予算の設定をしました。
コンソールページから、「お支払い」→「予算とアラート」→「予算を作成」を選択し、
「予算名」を入力し、「予算額」は「指定額」を入力し、金額を入力、「保存」を選択
するとどのくらい使っているか表示されるようになりました。
【追記】
予算のしきい値を超えるとメールで通知が来ます。
GCPで使える監視ツールのStackdriverを使ってみました。
Stackdriverは一定量までは無料で使えます。
1.Stackdriverの準備をする
最初にStackdvierのセットアップを行います。
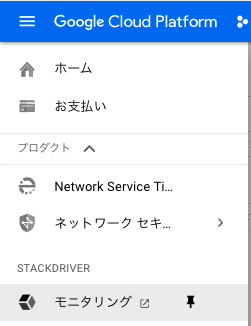
GCPのコンソール上から、「Stackdriver」の「モニタリング」を選択
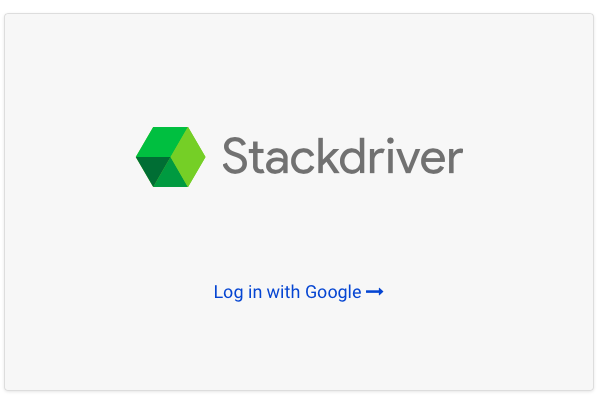
「Log in with google」を選択 ※Safariだとこの画面から先に行かなかったのでChromeを使用しました。
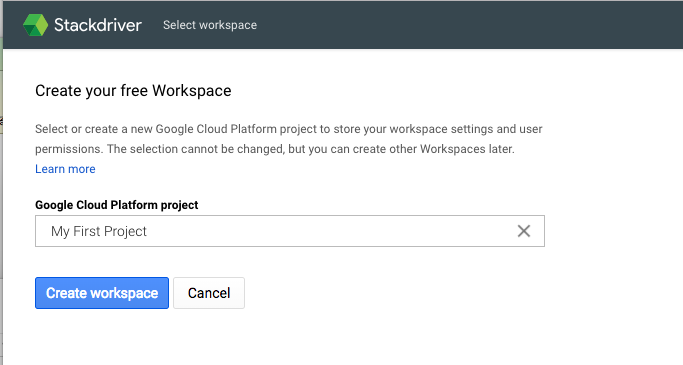
プロジェクトが選択されているのを確認してそのまま「Create workspace」を選択
「Continue」を選択
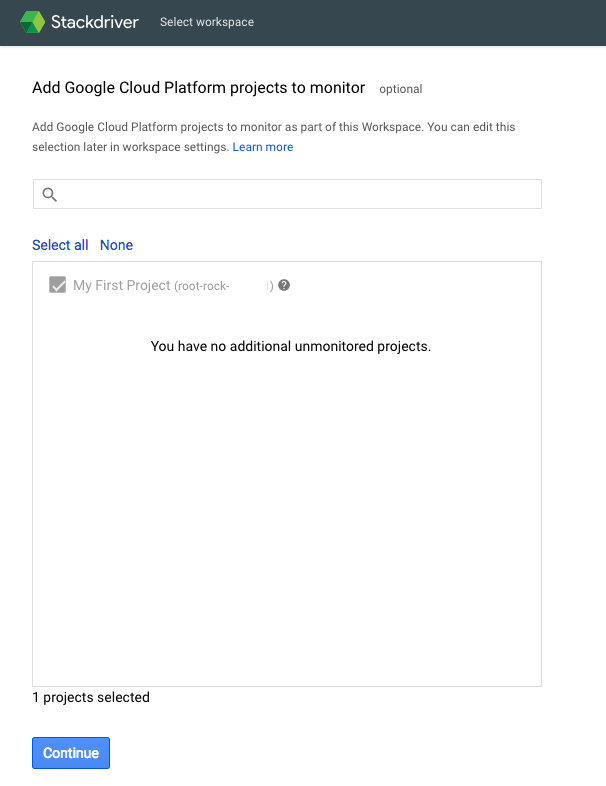
AWSの設定画面が出てきますがAWSは使ってないので「Skip AWS Setup」を選択
Agentをインストールするように指示があるので、

インスタンスにSSHで繋げて、下記4コマンドを実行。
$ curl -sSO https://dl.google.com/cloudagents/install-monitoring-agent.sh
$ sudo bash install-monitoring-agent.sh
$ curl -sSO https://dl.google.com/cloudagents/install-logging-agent.sh
$ sudo bash install-logging-agent.sh
実行結果
$ curl -sSO https://dl.google.com/cloudagents/install-monitoring-agent.sh
$ sudo bash install-monitoring-agent.sh
==============================================================================
Starting installation of stackdriver-agent
==============================================================================
Installing agent for Debian or Ubuntu.
OK
Reading package lists…
Building dependency tree…
Reading state information…
The following packages were automatically installed and are no longer required:
dbconfig-common javascript-common libjs-jquery libjs-sphinxdoc libjs-underscore libuuid-perl php-gettext
php-tcpdf
Use ‘apt-get autoremove’ to remove them.
The following extra packages will be installed:
libpython2.7 libyajl2
Suggested packages:
libpq5 libhiredis0.10 default-jre
The following NEW packages will be installed:
libpython2.7 libyajl2 stackdriver-agent
0 upgraded, 3 newly installed, 0 to remove and 5 not upgraded.
Need to get 2,743 kB of archives.
After this operation, 9,610 kB of additional disk space will be used.
Get:1 http://security.debian.org/ jessie/updates/main libpython2.7 amd64 2.7.9-2+deb8u2 [1,079 kB]
Get:2 http://deb.debian.org/debian/ jessie/main libyajl2 amd64 2.1.0-2 [23.2 kB]
Get:3 http://packages.cloud.google.com/apt/ google-cloud-monitoring-jessie/main stackdriver-agent amd64 5.5.2-382.jessie [1,640 kB]
Fetched 2,743 kB in 2s (1,339 kB/s)
Selecting previously unselected package libpython2.7:amd64.
(Reading database … 47892 files and directories currently installed.)
Preparing to unpack …/libpython2.7_2.7.9-2+deb8u2_amd64.deb …
Unpacking libpython2.7:amd64 (2.7.9-2+deb8u2) …
Selecting previously unselected package libyajl2:amd64.
Preparing to unpack …/libyajl2_2.1.0-2_amd64.deb …
Unpacking libyajl2:amd64 (2.1.0-2) …
Selecting previously unselected package stackdriver-agent.
Preparing to unpack …/stackdriver-agent_5.5.2-382.jessie_amd64.deb …
Unpacking stackdriver-agent (5.5.2-382.jessie) …
Processing triggers for systemd (215-17+deb8u7) …
Setting up libpython2.7:amd64 (2.7.9-2+deb8u2) …
Setting up libyajl2:amd64 (2.1.0-2) …
Setting up stackdriver-agent (5.5.2-382.jessie) …
Processing triggers for libc-bin (2.19-18+deb8u10) …
Processing triggers for systemd (215-17+deb8u7) …
==============================================================================
Installation of stackdriver-agent-5.5.2-382 completed successfully.
Please consult the documentation for troubleshooting advice:
https://cloud.google.com/monitoring/agent
You can monitor the monitoring agent’s logfile at:
/var/log/syslog
==============================================================================
$ curl -sSO https://dl.google.com/cloudagents/install-logging-agent.sh
$ sudo bash install-logging-agent.sh
==============================================================================
Starting installation of google-fluentd
==============================================================================
Installing agents for Debian or Ubuntu.
OK
Selecting previously unselected package google-fluentd.
(Reading database … 48318 files and directories currently installed.)
Preparing to unpack …/google-fluentd_1.5.36-1_amd64.deb …
Unpacking google-fluentd (1.5.36-1) …
Selecting previously unselected package google-fluentd-catch-all-config.
Preparing to unpack …/google-fluentd-catch-all-config_0.7_all.deb …
Unpacking google-fluentd-catch-all-config (0.7) …
Setting up google-fluentd (1.5.36-1) …
Adding system user `google-fluentd’ (UID 109) …
Adding new group `google-fluentd’ (GID 115) …
Adding new user `google-fluentd’ (UID 109) with group `google-fluentd’ …
Not creating home directory `/home/google-fluentd’.
Installing default conffile /etc/google-fluentd/google-fluentd.conf …
Setting up google-fluentd-catch-all-config (0.7) …
Processing triggers for libc-bin (2.19-18+deb8u10) …
==============================================================================
Installation of google-fluentd complete.
Logs from this machine should be visible in the log viewer at:
https://console.cloud.google.com/logs/viewer?project=root-rock-210901&resource=gce_instance/instance_id/3367654606019440183
A test message has been sent to syslog to help verify proper operation.
Please consult the documentation for troubleshooting advice:
https://cloud.google.com/logging/docs/agent
You can monitor the logging agent’s logfile at:
/var/log/google-fluentd/google-fluentd.log
==============================================================================
$
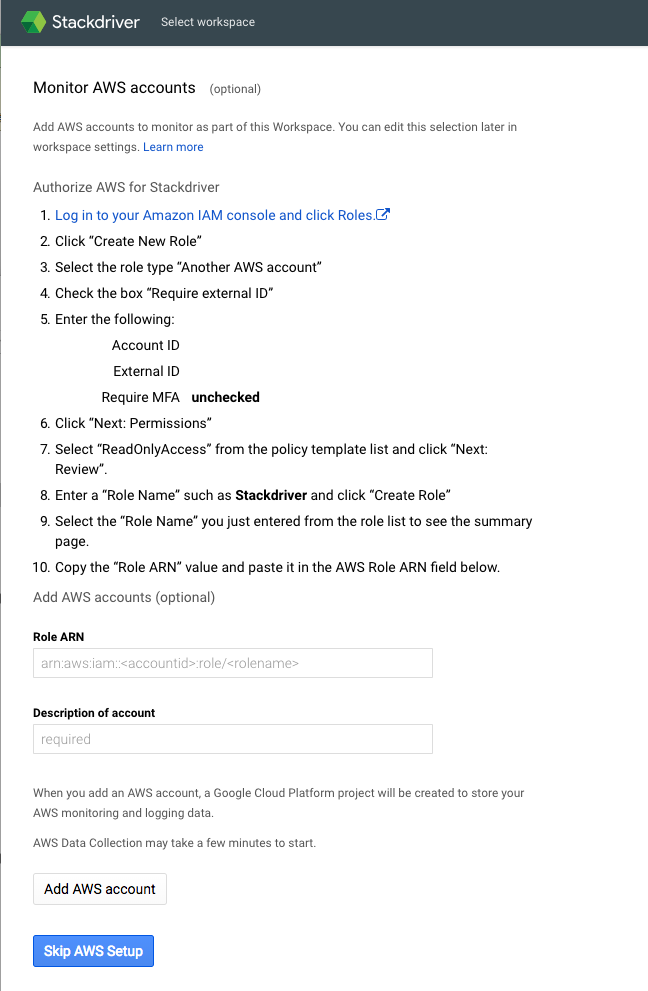
その後、「Continue」を選択。
メール通知は適当に選んで「Continue」
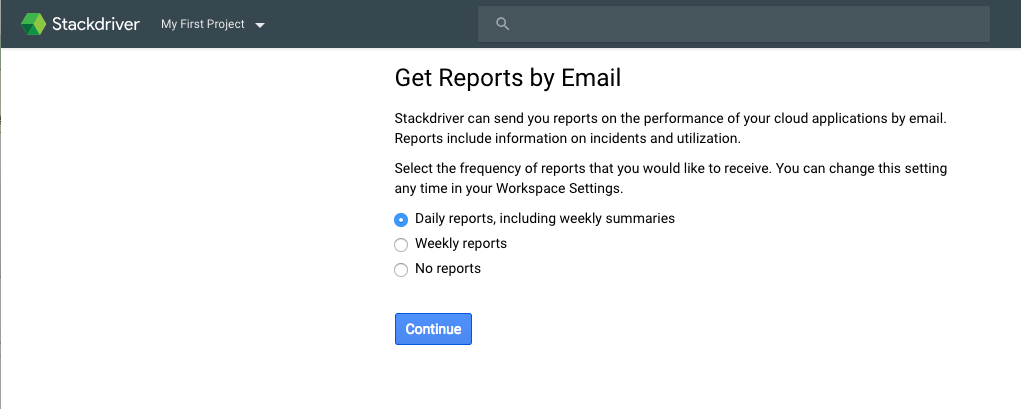
「Launch monitoring」を選択すると、

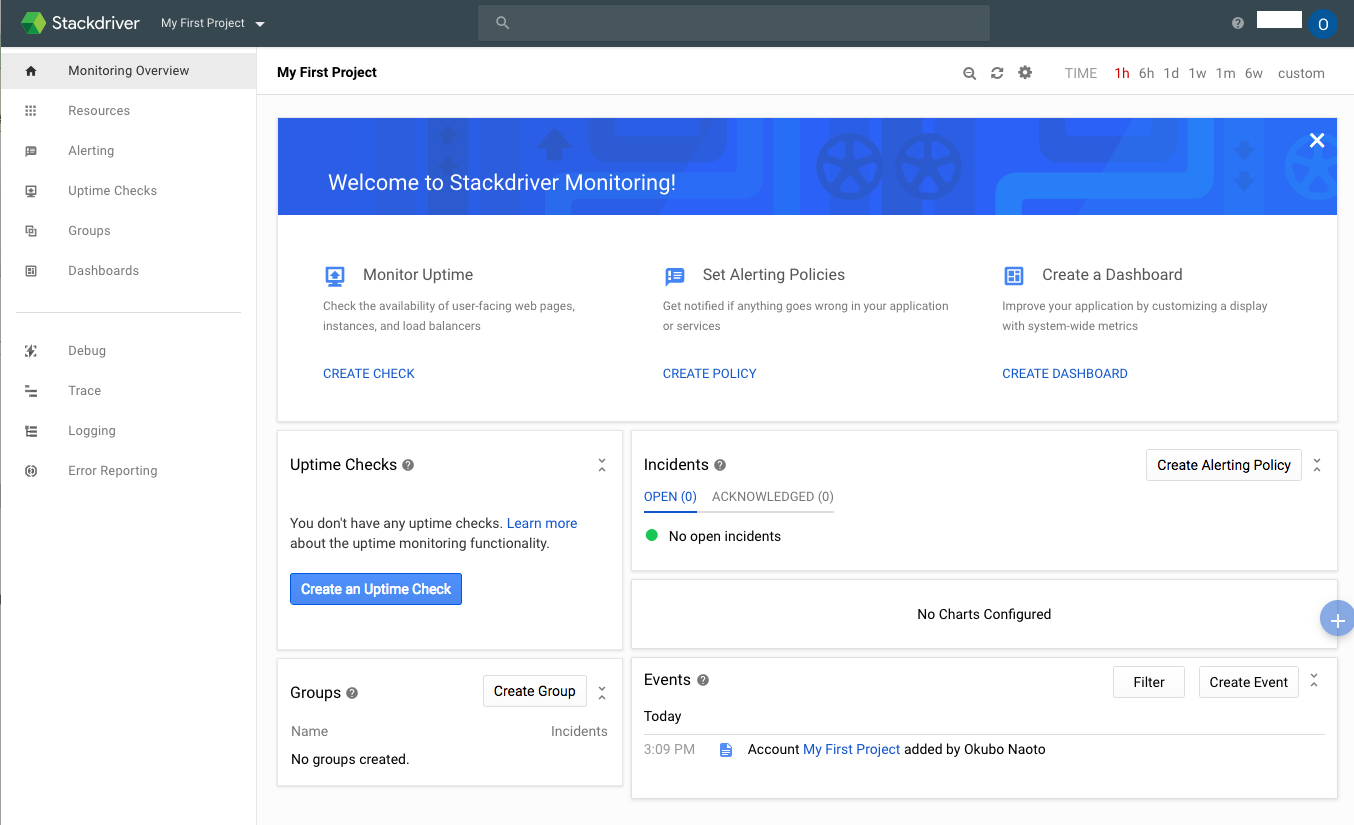
Stackdriverのトップページが開きます。
2-1.Uptime Checkの作成
インスタンスの動作状態を監視するUptime Checkを設定します。
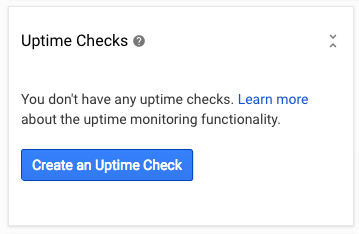
Stackdriverのトップページにある「Create an Uptime Check」を設定します。
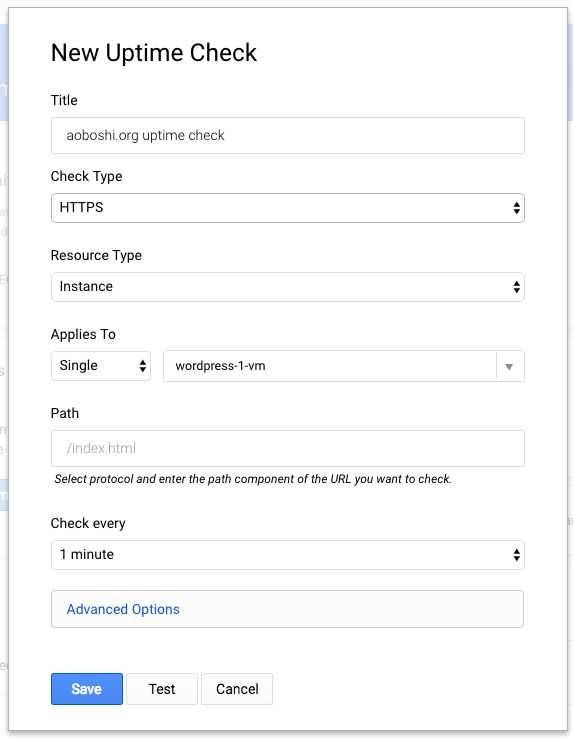
Titleを適当につけ、
「Check Type」は「HTTPS」
「Resource Type」は「Instance」
「Applies To」「Path」は初期のまま、
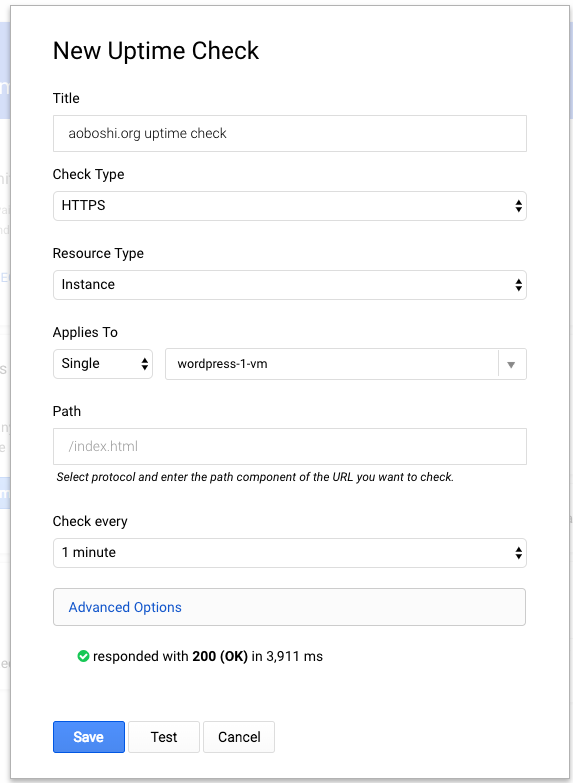
「Check every」は「1 minutes」にして「Test」を選択します。
「responded with 200 (OK)」と、正常に動いていることがわかったので、「Save」を選択します。
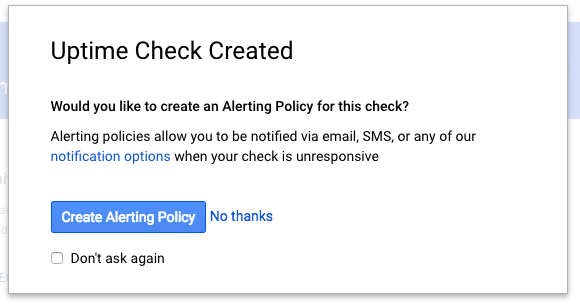
「Create Alerting Policy」を選択します。
「Add Another Notification」を選択し「Email」を選択、通知を受けとるメールアドレスを入力し、「Save Policy」を選択します。

2-1.Uptime Checkの試験
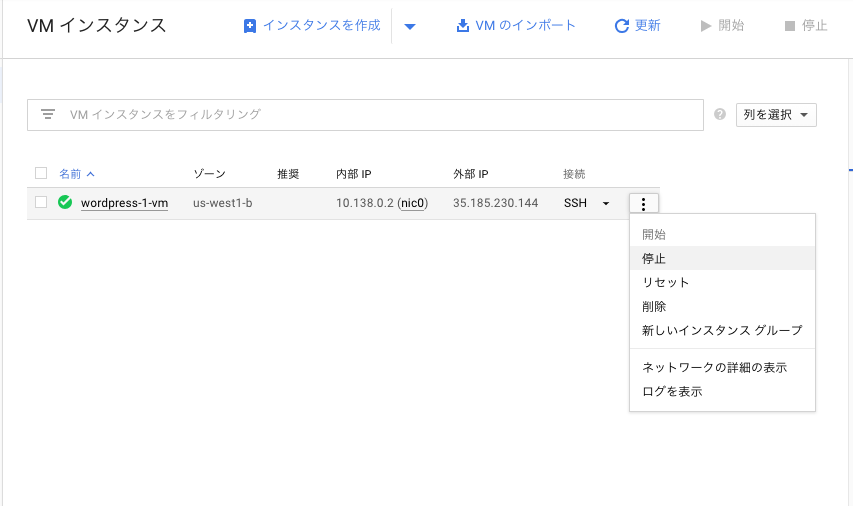
GCPのコンソール上から、インスタンスを落とします。
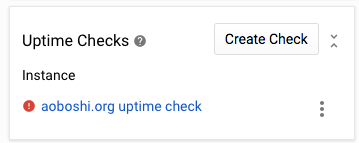
しばらくすると、Stackdriverのトップページにある「Create an Uptime Check」が赤アイコンになり、
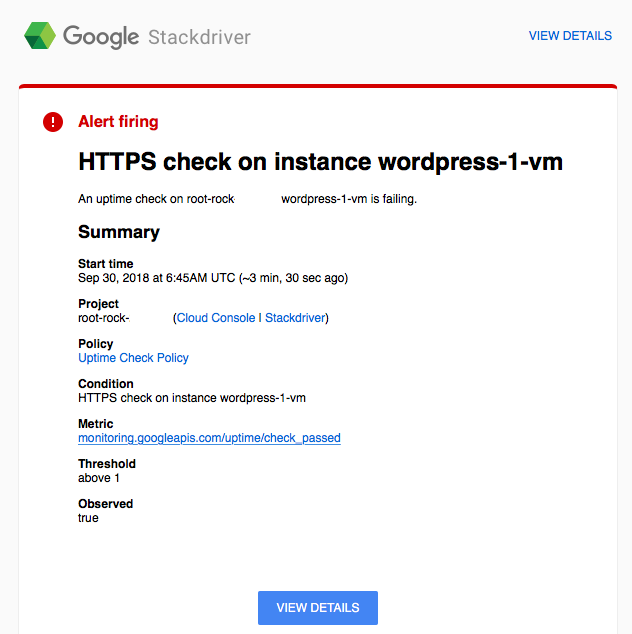
メールで通知が飛んできます、
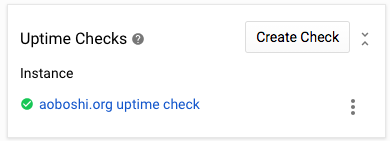
インスタンスを立ち上げ直してしばらくすると「Create an Uptime Check」が緑アイコンに戻り、
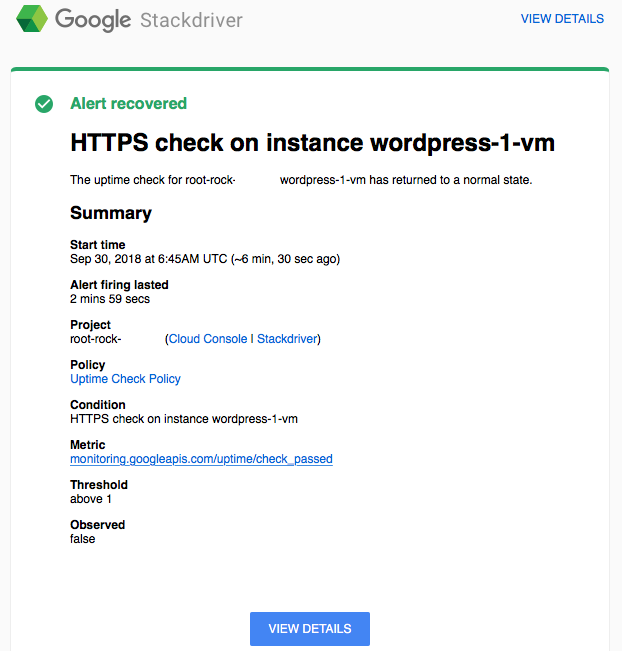
復旧したことを知らせるメール通知が飛んできます。
3.Dashboardの作成
Dashboardを作成し、CPUやメモリなどリソースの状態を見られるようにします。
Stackdriverのトップページにある「Dashboards」から「Create Dashboard」を選択

Dashboard画面が開くので、右上の「Add chart」を選択
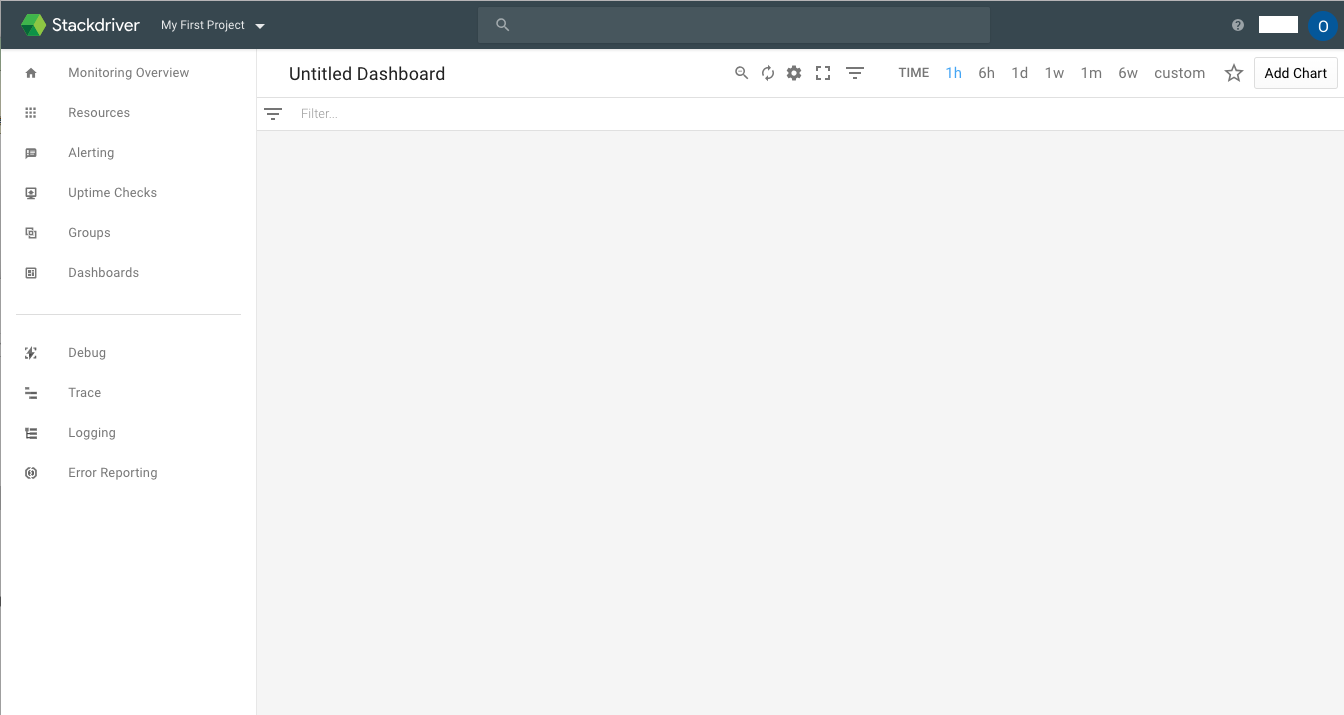
「Find resource type and metric」に「CPU」と入力し、

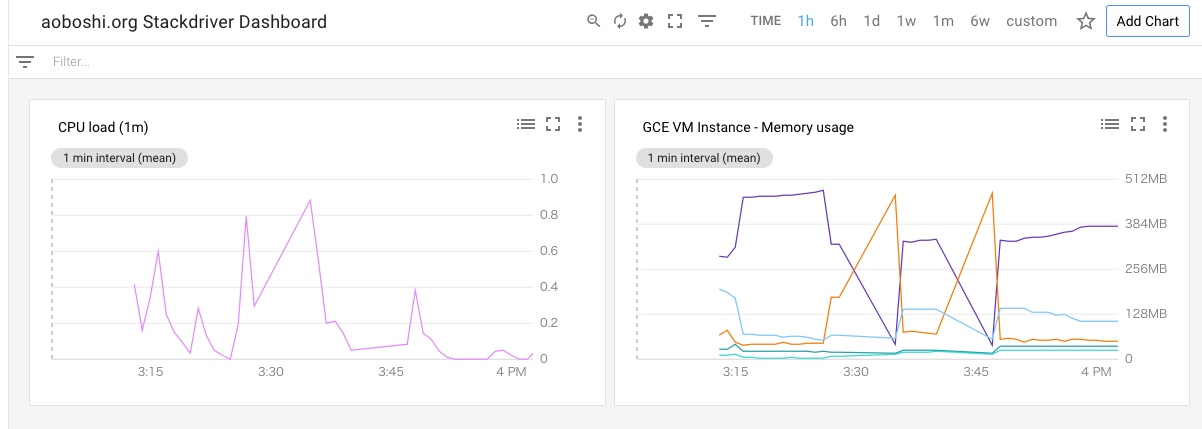
「CPU load (1m)」を選択し、「SAVE」を選択

再度「Add chart」を選択、「Find resource type and metric」に「mem」と入力し、「Memory usage」を選択、
「SAVE」を選択

CPUとメモリのリソース監視用グラフが完成しました。ついでに「Untitled Dashboard」となっているDashboardの名称もも選択すると編集できるので編集しました。
4.インスタンス上の各種ログを確認する
Stackdriverはsyslogやapacheのaccsessログの確認が出来ます。
Stackdriverトップページの「Logging」か、
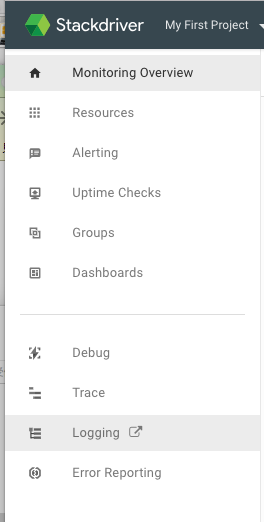
GCPコンソールページの「STACKDRIVER」「Logging」「ログ」
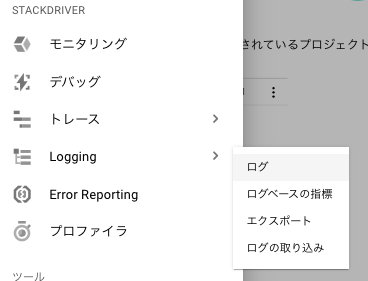
のどちらかで見ることが出来ます。
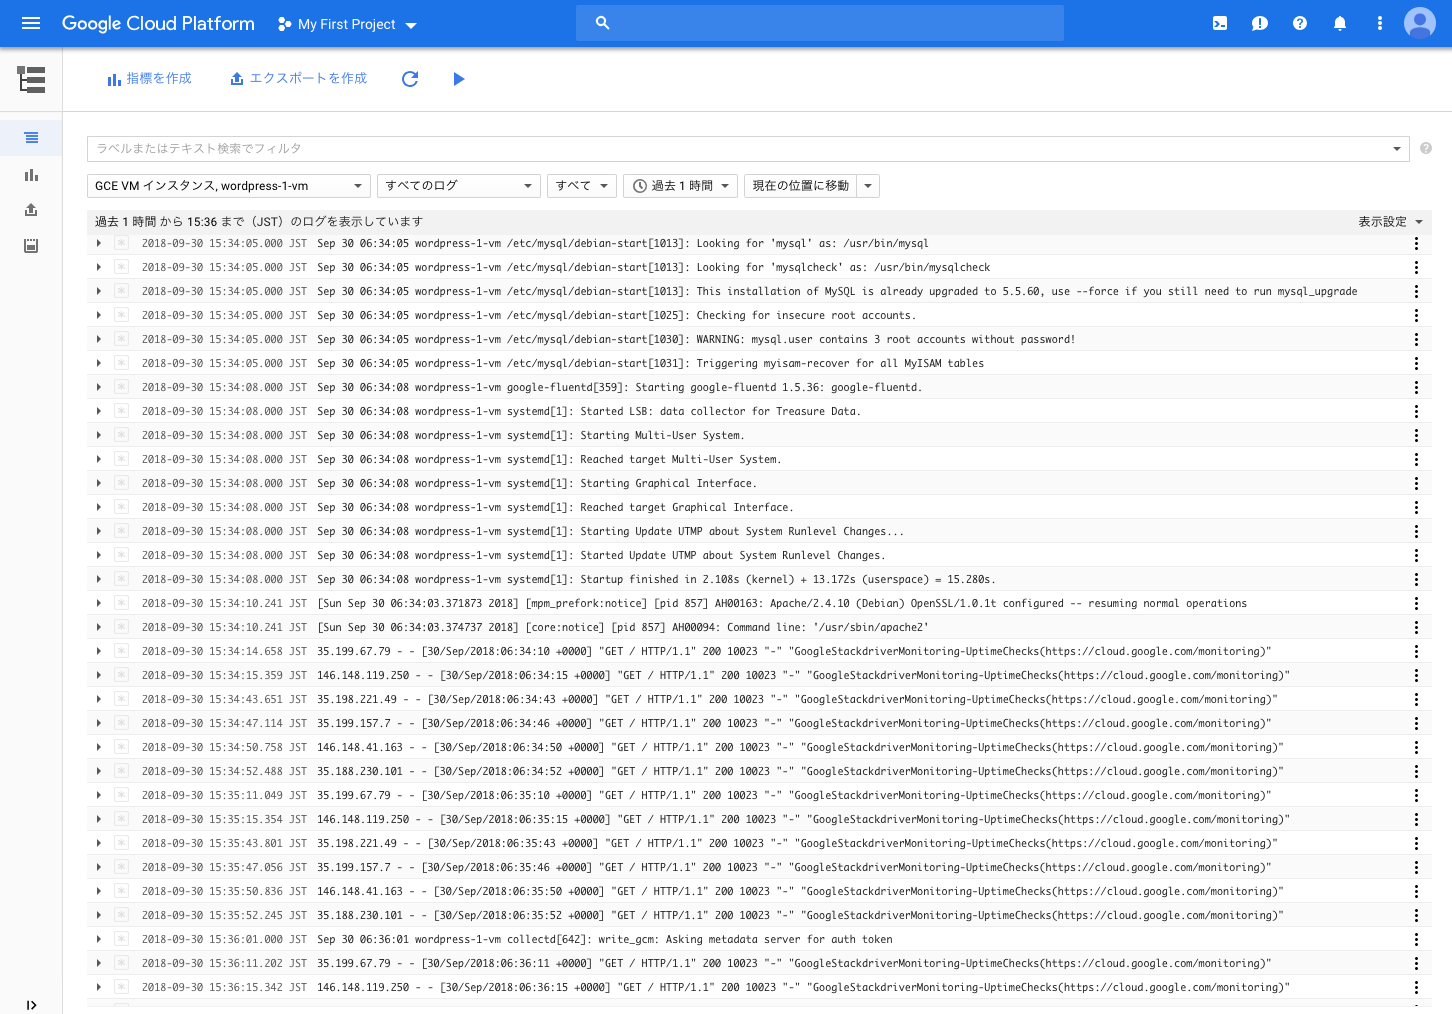
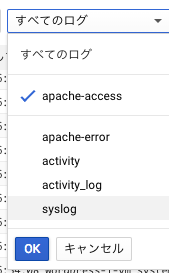
「すべてのログ」を選ぶと、ログの種類を絞ることが出来ます。
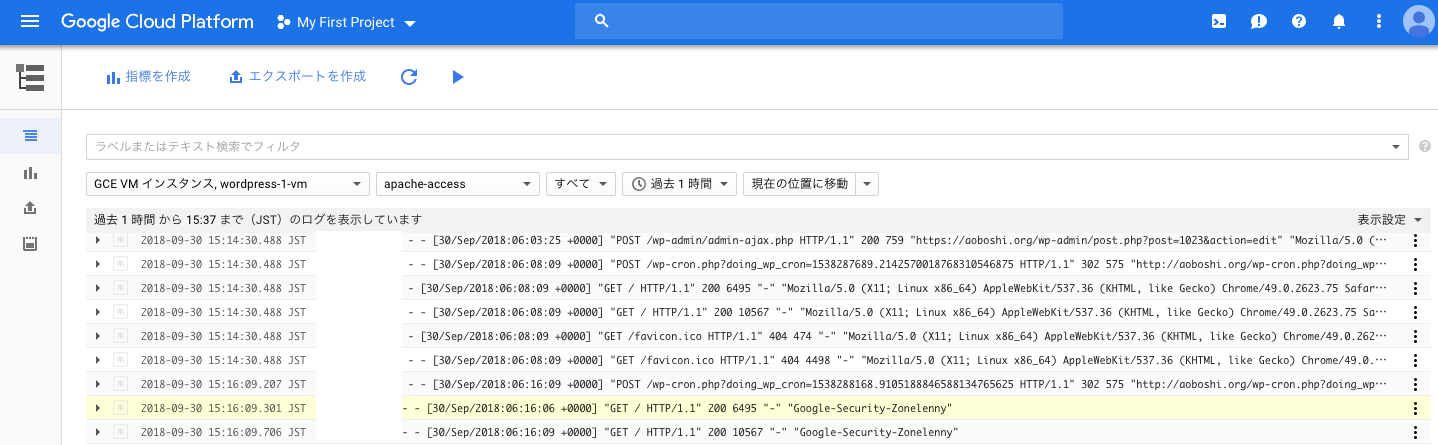
以上、さわりだけですが、それでもいろいろと試すことが出来ました。
以前、ウェブデザイン技能士という国家資格があるのを知り、先月受験をしておりましたが、昨日無事に「3級ウェブデザイン技能士」の合格証書が家に届きました。

【勉強方法】
公式サイトの過去問を見たところ、それほど難しそうではなかったので、テキスト等は購入せず、過去問演習とネット検索で勉強しました。
1.筆記試験対策
過去問演習をしました。
公式サイトではぱっと見直近3回分しかないようですが、サーバ上には残っているので、pdfファイル名を推測すると、過去10回分を入手することが出来ました。
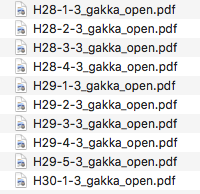
問題を解いて、わからない用語は検索して調べました。
2.実技試験対策
実技試験についても公式サイトに練習問題があるので、それを順にやりました。Webサイトの作成や更新をやったことのある方なら難しくはないと思います。
【試験当日】
1.実技試験
当日は実技試験からでした。テキストエディタが複数選べましたが、仕事で慣れているサクラエディタを使用しました。
問題は作業12456の5問を選択しました。(3は何を中央揃えにするのかよくわからなかった)
作業1245は自分の中では完璧にできたと思っていますが、作業6の「ol 要素、ul 要素」についてやり方を忘れてしまい、そこだけ出来ていない状態だったのが心残りです。
ol 要素
<ol>
<li>あいうえお</li>
<li>かきくけこ</li>
<li>さしすせそ</li>
</ol>
ul 要素
<ul>
<li>あいうえお</li>
<li>かきくけこ</li>
<li>さしすせそ</li>
</ul>
2.筆記試験
筆記試験はわからない問題もあまりなく、自信を持って答えることが出来ました。
退出可能時間になったら自分以外の人はぞろぞろ抜けてしまいましたが、
45分の試験時間で、15分程度早くかえるくらいならぎりぎりまで見直ししていようと、1人最後まで残っていました。
後日、正答が公開されたので、自己採点をしたところ、11、12以外は正解していました。
【感想】
私の受けた3級は受験資格もなく、それほど難しい問題でもないので、業務でWebサイト作成等されている方ではなくても、個人でWebサイトの作成・更新をされたことのあるかたでしたら是非受けてみるといいと思います。
2級は…JavaScriptやPHP、Adobe製品を使った画像編集等、いままで私の経験がない分野も範囲で、難しそうなので当面見合わせです…。
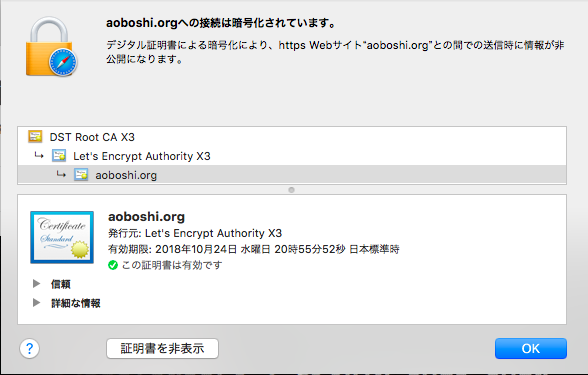
当ブログは常時SSL化をしていますが、期限切れまで1ヶ月を切ったので、9/24に更新をしてみました。
Let’s Encryptは「certbot renew」コマンドで更新が出来ます。
とりあえずそのまま打つと、
$ sudo certbot renew
Saving debug log to /var/log/letsencrypt/letsencrypt.log
——————————————————————————-
Processing /etc/letsencrypt/renewal/aoboshi.org.conf
——————————————————————————-
Cert is due for renewal, auto-renewing…
Starting new HTTPS connection (1): acme-v01.api.letsencrypt.org
Renewing an existing certificate
Performing the following challenges:
tls-sni-01 challenge for aoboshi.org
——————————————————————————-
The program apache2 (process ID 26473) is already listening on TCP port 443.
This will prevent us from binding to that port. Please stop the apache2 program
temporarily and then try again. For automated renewal, you may want to use a
script that stops and starts your webserver. You can find an example at
https://certbot.eff.org/docs/using.html#renewal . Alternatively you can use the
webroot plugin to renew without needing to stop and start your webserver.
——————————————————————————-
Cleaning up challenges
Attempting to renew cert from /etc/letsencrypt/renewal/aoboshi.org.conf produced an unexpected error: At least one
of the required ports is already taken.. Skipping.
——————————————————————————-
Processing /etc/letsencrypt/renewal/www.aoboshi.org.conf
——————————————————————————-
Cert not yet due for renewal
The following certs are not due for renewal yet:
/etc/letsencrypt/live/www.aoboshi.org/fullchain.pem (skipped)
All renewal attempts failed. The following certs could not be renewed:
/etc/letsencrypt/live/aoboshi.org/fullchain.pem (failure)
1 renew failure(s), 0 parse failure(s)
$
apacheを落としてくださいと表示をされたので、「systemctl stop apache2」で停止、
再度実施すると、
$ sudo certbot renew
Saving debug log to /var/log/letsencrypt/letsencrypt.log
——————————————————————————-
Processing /etc/letsencrypt/renewal/aoboshi.org.conf
——————————————————————————-
Cert is due for renewal, auto-renewing…
Starting new HTTPS connection (1): acme-v01.api.letsencrypt.org
Renewing an existing certificate
Performing the following challenges:
tls-sni-01 challenge for aoboshi.org
/usr/lib/python2.7/dist-packages/OpenSSL/rand.py:58: UserWarning: implicit cast from ‘char *’ to a different pointe
r type: will be forbidden in the future (check that the types are as you expect; use an explicit ffi.cast() if they
are correct)
result_code = _lib.RAND_bytes(result_buffer, num_bytes)
Waiting for verification…
Cleaning up challenges
Generating key (2048 bits): /etc/letsencrypt/keys/0002_key-certbot.pem
Creating CSR: /etc/letsencrypt/csr/0002_csr-certbot.pem
——————————————————————————-
new certificate deployed with reload of apache server; fullchain is
/etc/letsencrypt/live/aoboshi.org/fullchain.pem
——————————————————————————-
——————————————————————————-
Processing /etc/letsencrypt/renewal/www.aoboshi.org.conf
——————————————————————————-
Cert not yet due for renewal
The following certs are not due for renewal yet:
/etc/letsencrypt/live/www.aoboshi.org/fullchain.pem (skipped)
Congratulations, all renewals succeeded. The following certs have been renewed:
/etc/letsencrypt/live/aoboshi.org/fullchain.pem (success)
$
「aoboshi.org」の証明書更新は問題なくできました。
「www.aoboshi.org」に関しましては、1ヶ月以上期限があるので更新不要とスキップされました。
その後、落としたapacheを「systemctl start apache2」で立ち上げてもWebサイトに接続できなくなりましたが、
「systemctl restart apache2」で再起動したら無事接続できるようになりました。
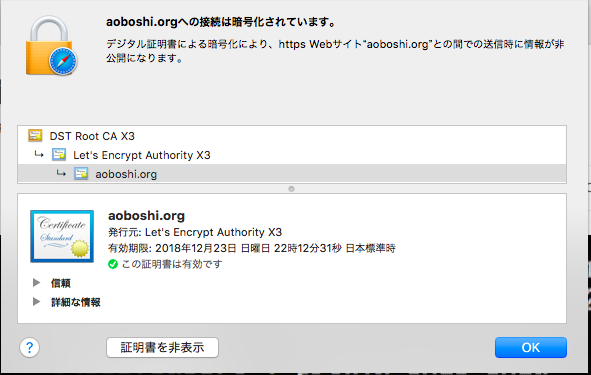
数日後、www.aoboshi.orgの証明書も更新しようと思い、
まず「certbot certificates」で証明書の状態を確認したところ、
# certbot certificates
Saving debug log to /var/log/letsencrypt/letsencrypt.log
——————————————————————————-
Found the following certs:
Certificate Name: aoboshi.org
Domains: aoboshi.org
Expiry Date: 2018-12-23 13:12:31+00:00 (VALID: 85 days)
Certificate Path: /etc/letsencrypt/live/aoboshi.org/fullchain.pem
Private Key Path: /etc/letsencrypt/live/aoboshi.org/privkey.pem
Certificate Name: www.aoboshi.org
Domains: www.aoboshi.org
Expiry Date: 2018-12-26 11:21:35+00:00 (VALID: 88 days)
Certificate Path: /etc/letsencrypt/live/www.aoboshi.org/fullchain.pem
Private Key Path: /etc/letsencrypt/live/www.aoboshi.org/privkey.pem
——————————————————————————-
#
www.aoboshi.orgについても更新がされていました。
更新をした覚えはないので調べたところ、
$ sudo systemctl list-timers
NEXT LEFT LAST PASSED UNIT AC
Sun 2018-09-30 09:03:46 UTC 4h 5min left Sat 2018-09-29 09:03:46 UTC 19h ago systemd-tmpfiles-clean.timer sy
Sun 2018-09-30 12:00:00 UTC 7h left Sun 2018-09-30 00:00:01 UTC 4h 57min ago certbot.timer ce
2 timers listed.
Pass –all to see loaded but inactive timers, too.
$
日次でアップデートを実行する設定がLet’s Encrypt設定時にsystemdに組み込まれていたので、自動で更新されていたことがわかりました。
当ブログは常時SSL化をしておりますが、SSL Server Test (Powered by Qualys SSL Labs)で診断を行ったところ、
結果が一部不備がある「B」を判定されてしまいました。
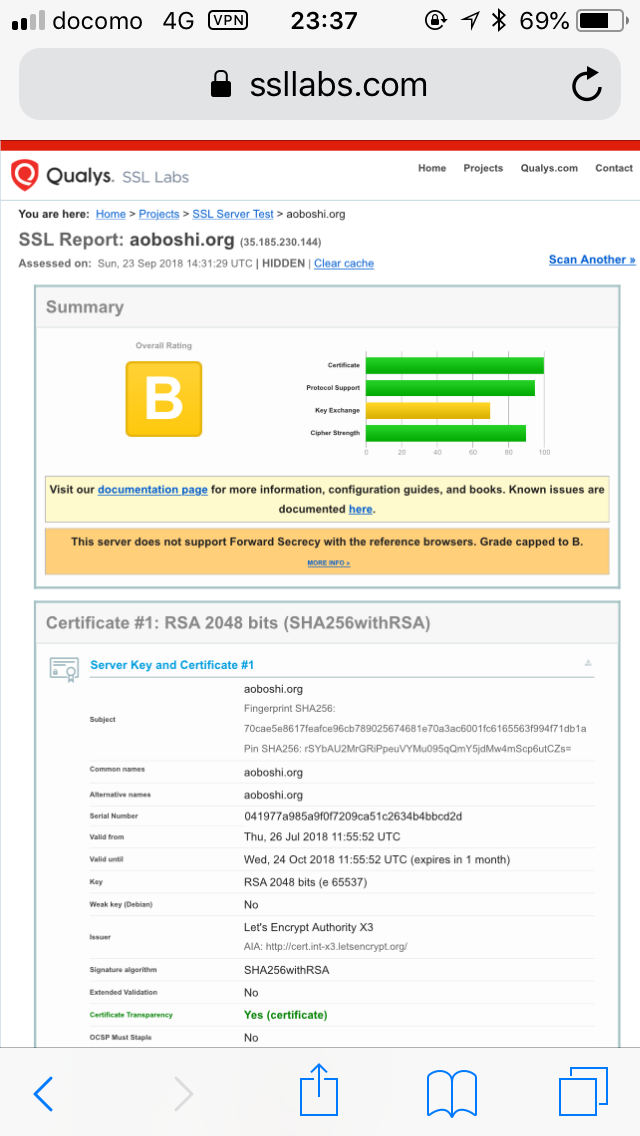
どうやら、Forward secrecyと言うものが有効になっていないのが問題でした。
設定方法を調べたところ、Mozillaが設定ジェネレータを用意していることを知り、
Generate Mozilla Security Recommended Web Server Configuration Files
早速、使用しているソフトとそのバージョンを入力し、設定を作成、
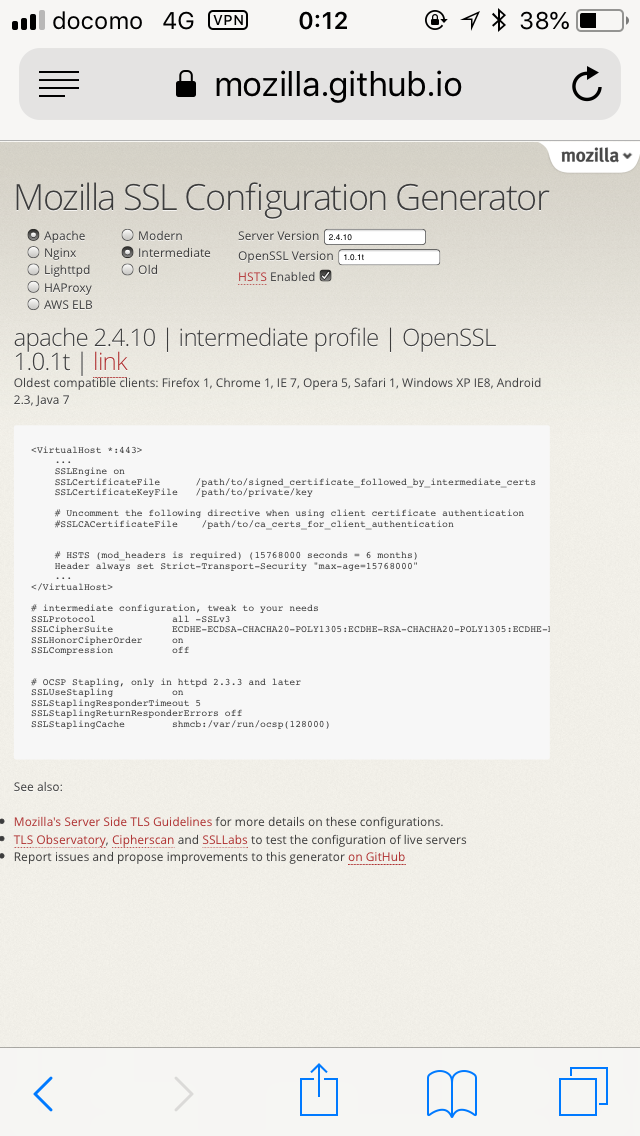
# intermediate configuration, tweak to your needs
SSLProtocol all -SSLv3
SSLCipherSuite ECDHE-ECDSA-CHACHA20-POLY1305:ECDHE-RSA-CHACHA20-POLY1305:ECDHE-ECDSA-AES128-GCM-SHA256:ECDHE-RSA-AES128-GCM-SHA256:ECDHE-ECDSA-AES256-GCM-SHA384:ECDHE-RSA-AES256-GCM-SHA384:DHE-RSA-AES128-GCM-SHA256:DHE-RSA-AES256-GCM-SHA384:ECDHE-ECDSA-AES128-SHA256:ECDHE-RSA-AES128-SHA256:ECDHE-ECDSA-AES128-SHA:ECDHE-RSA-AES256-SHA384:ECDHE-RSA-AES128-SHA:ECDHE-ECDSA-AES256-SHA384:ECDHE-ECDSA-AES256-SHA:ECDHE-RSA-AES256-SHA:DHE-RSA-AES128-SHA256:DHE-RSA-AES128-SHA:DHE-RSA-AES256-SHA256:DHE-RSA-AES256-SHA:ECDHE-ECDSA-DES-CBC3-SHA:ECDHE-RSA-DES-CBC3-SHA:EDH-RSA-DES-CBC3-SHA:AES128-GCM-SHA256:AES256-GCM-SHA384:AES128-SHA256:AES256-SHA256:AES128-SHA:AES256-SHA:DES-CBC3-SHA:!DSS
SSLHonorCipherOrder on
SSLCompression off
# OCSP Stapling, only in httpd 2.3.3 and later
SSLUseStapling on
SSLStaplingResponderTimeout 5
SSLStaplingReturnResponderErrors off
SSLStaplingCache shmcb:/var/run/ocsp(128000)
の部分をコピーし、
サーバ上のコンフィグの
apacheの再起動を行ったところ、

無事に「A」判定になりました。
今まで、当ブログを開くと、indexでも記事が前文表示されてしまい、非常に見づらい表示だったので修正いたしました。
詳細は下記へ。

【修正方法】
※この例は当ブログで使用しているテーマ、「Twenty Twelve」の場合の話です。他のテーマでも参考になるかもしれませんが、完全に同じにはならない可能性があります。
1. テーマの編集でcontent.phpを開く
外観>テーマの編集>content.php を選択します。

2.content.phpの修正
下記のような記載があるので、
<?php if ( is_search() ) : // Only display Excerpts for Search ?>
<div class=”entry-summary”>
<?php the_excerpt(); ?>
</div><!– .entry-summary –>
<div class=”entry-summary”>
<?php the_excerpt(); ?>
</div><!– .entry-summary –>
<?php else : ?>
<div class=”entry-content”>
<?php the_content( __( ‘Continue reading <span class=”meta-nav”>→</span>’, ‘twentytwelve’ ) ); ?>
下記の太字部分を追記し、「ファイルを更新」ボタンを選択します。
<?php if ( is_search() ) : // Only display Excerpts for Search ?>
<div class=”entry-summary”>
<?php the_excerpt(); ?>
</div><!– .entry-summary –>
<?php elseif ( is_archive() ) : // 一覧の際はサマリー表示に ?>
<div class=”entry-summary”>
<?php the_excerpt(); ?>
</div><!– .entry-summary –>
<?php elseif ( is_home() ) : // トップページの際はサマリー表示に ?>
<div class=”entry-summary”>
<?php the_excerpt(); ?>
</div><!– .entry-summary –>
<?php else : ?>
<div class=”entry-content”>
<?php the_content( __( ‘Continue reading <span class=”meta-nav”>→</span>’, ‘twentytwelve’ ) ); ?>
【解説】
WordPressでは「the_excerpt()」は抜粋表示、「the_content()」は全文表示を意味します。
初期の設定では、検索結果のページ「is_search()」以外は「the_content()」が指定されていたため、
「elseif」でor条件を追加し、カテゴリや日付などの一覧ページ「is_archive」や、トップページ「is_home()」の場合も「the_excerpt()」となるように書き換えました。
今まで、GCPの操作は主にGUIを使用していましたが、
「Cloud Shell」を使用すればCLIでも操作できるのを知り、試してみました。
1.準備
ダッシュボード画面の右側上部にある「Cloud Shell」アイコンを選択、

「CLOUD SHELL の起動」を選択

すると、画面下部にCloud Shellが立ち上がります。これで各種操作を行います。

蛇足ですが、Cloud ShellはDebian系Linuxで動いているようです。普通にLinuxのコマンドも通ります。

2.コマンドを実行してみる
Cloud Shellでは多くのことが出来るようですが、一部簡単なものからためしてみました。
$ gcloud auth list
操作中のGCPにログインできるアカウントの一覧を表示します。

$ gcloud config list project
プロジェクトの一覧を表示します。

$ gcloud compute instance list
インスタンスの一覧とその情報を表示します。

$gcloud compute ssh インスタンス名 –zone ゾーン名
インスタンスにsshで接続します。GUIで実施するのとほぼ同等です。


途中で2回*2の計4パスワードを聞かれますので、
パスワードは最初の1回目の際に任意のものを決め、残りの3回は同じものを入力してください。

ログイン完了後は、GUIで接続した場合と同様に使用できます。
$ gcloud compute instance stop インスタンス名 –zone ゾーン名
インスタンスを停止します。


$ gcloud compute instance start インスタンス名 –zone ゾーン名
インスタンスを起動します。


インスタンス停止・起動はGUIで実施するのと同等の動作となります。